One of the cool things about Azure Data Studio is that you can install extensions to extend its capabilities. One of those extensions is the SQL Server Agent extension.
This extension allows you to do stuff like create jobs, view jobs, view job history, stop/start jobs, etc.
This article shows you how to install the SQL Server Agent extension on Azure Data Studio.
Install the Extension
From Azure Data Studio, click on the Extensions icon to bring up the extensions in the sidebar.
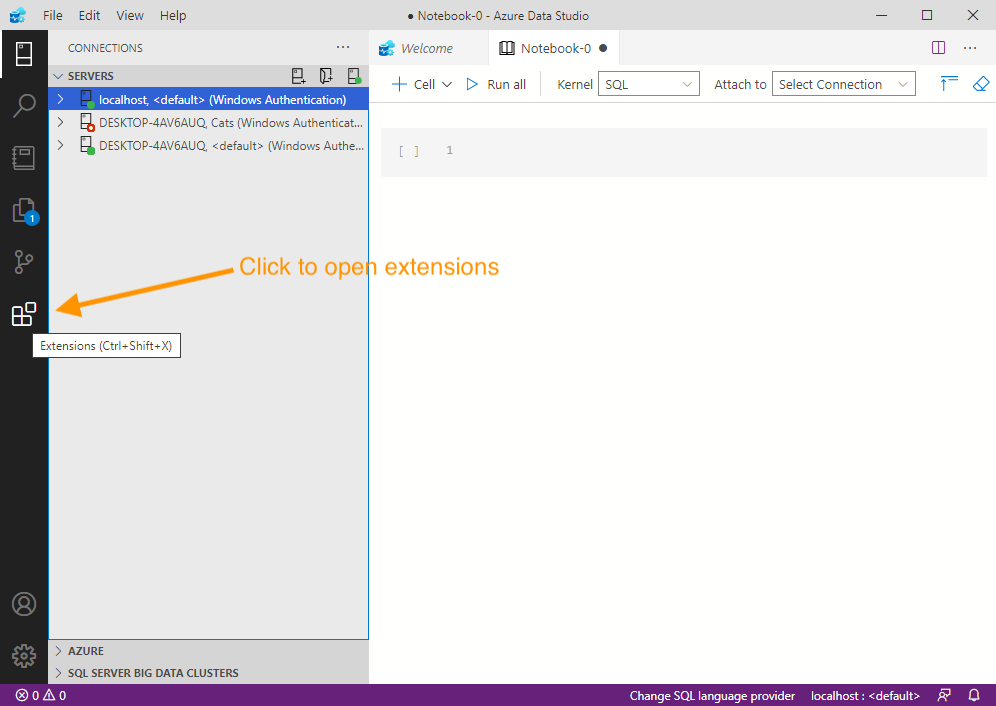
Clicking that icon opens the Extensions pane.
From the Extensions pane, enter sql server agent (or even just agent) into the search box at the top. This should filter the extensions to just the SQL Server Agent, like this:
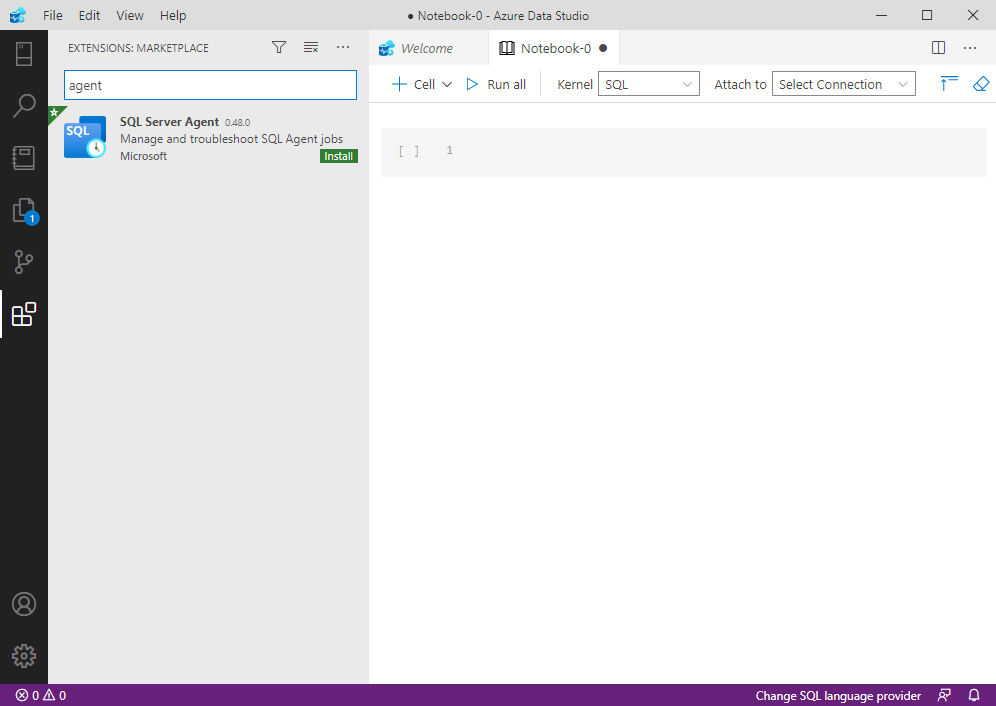
Click Install.
This will install the extension. Once it’s installed, the SQL Server Agent screen should indicate that it has been installed:
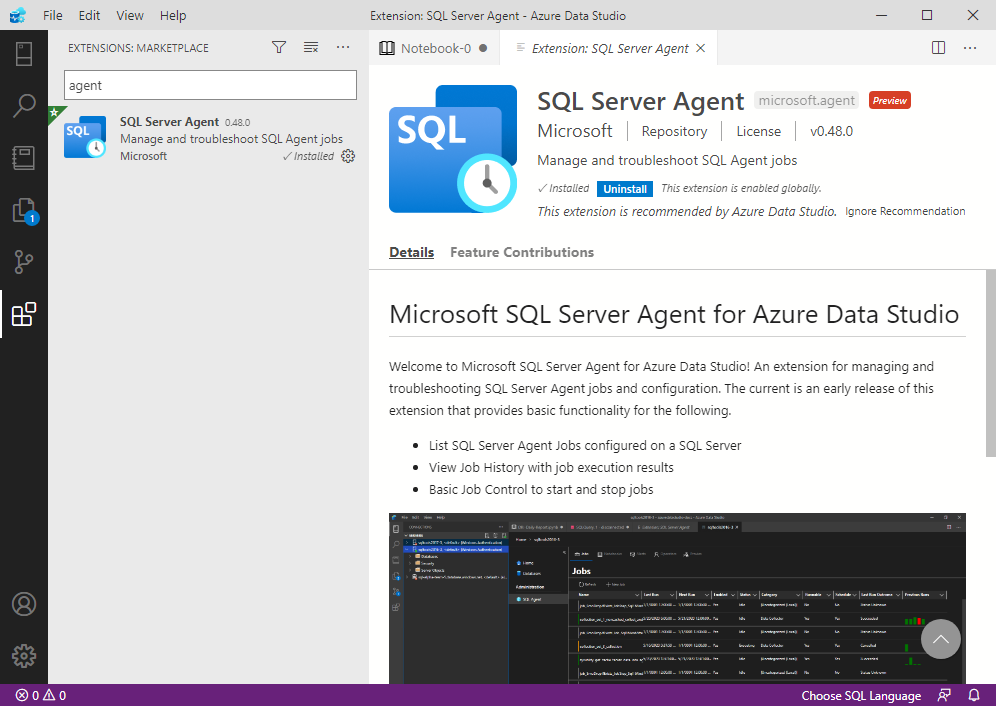
We can see in the above screenshot that Installed has a check mark next to it, and an Uninstall button appears next to it.
Use the Extension
Now that the SQL Server Agent extension is installed, we can go ahead and use it.
You can find the SQL Server Agent extension on the management tab for a server.
When you have the servers showing in the left pane, right-click on a server’s name to bring up the contextual menu:
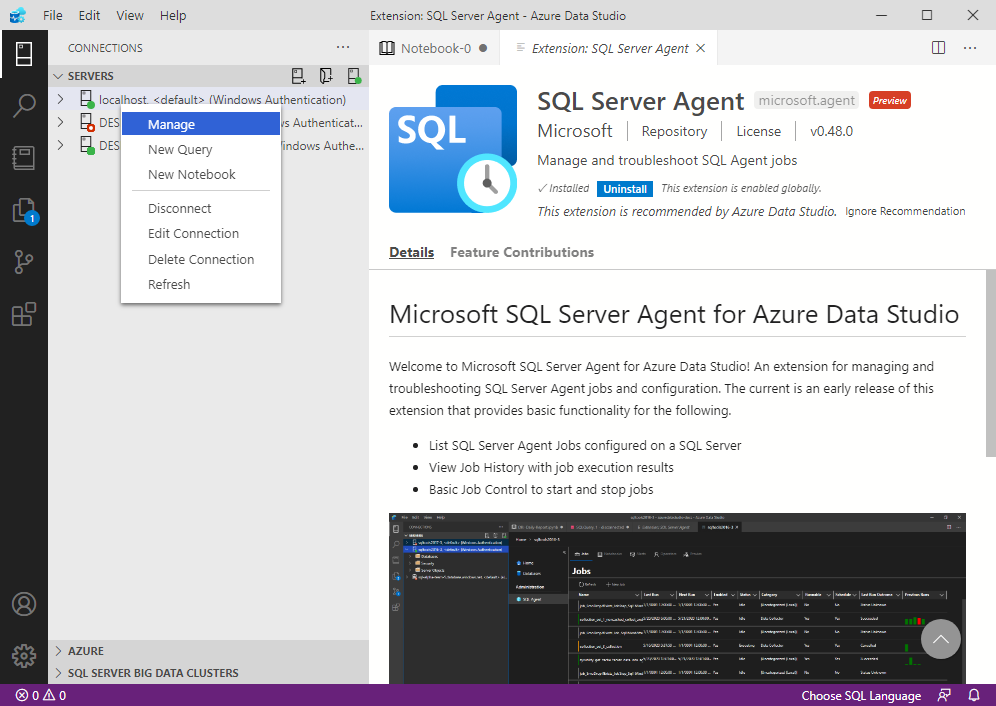
From the menu, click Manage.
That opens the management Home screen for the server:
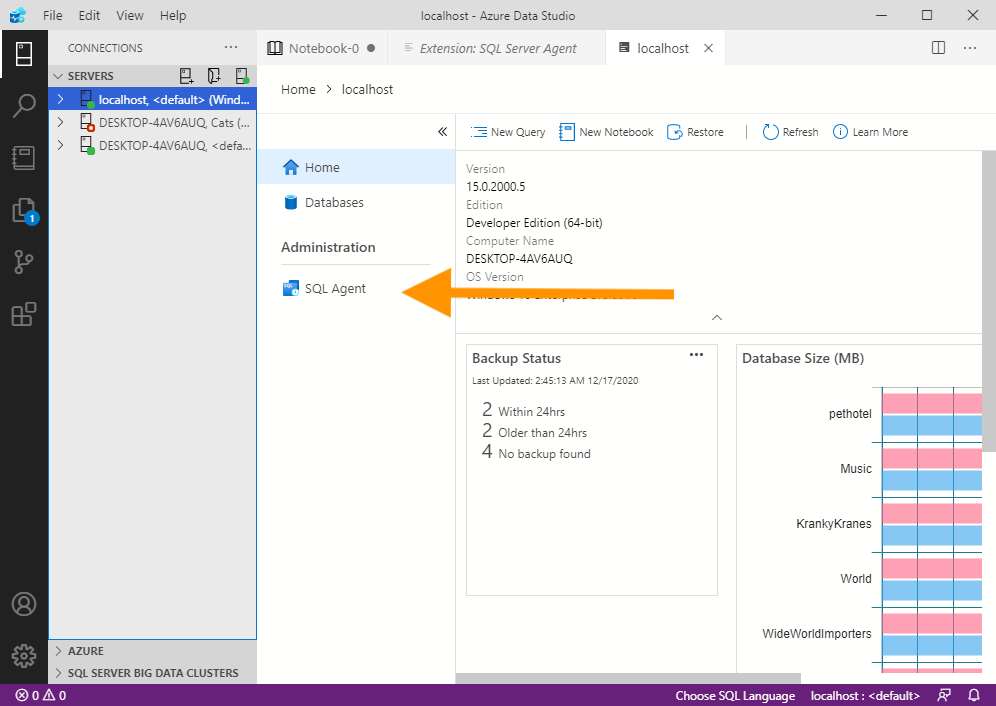
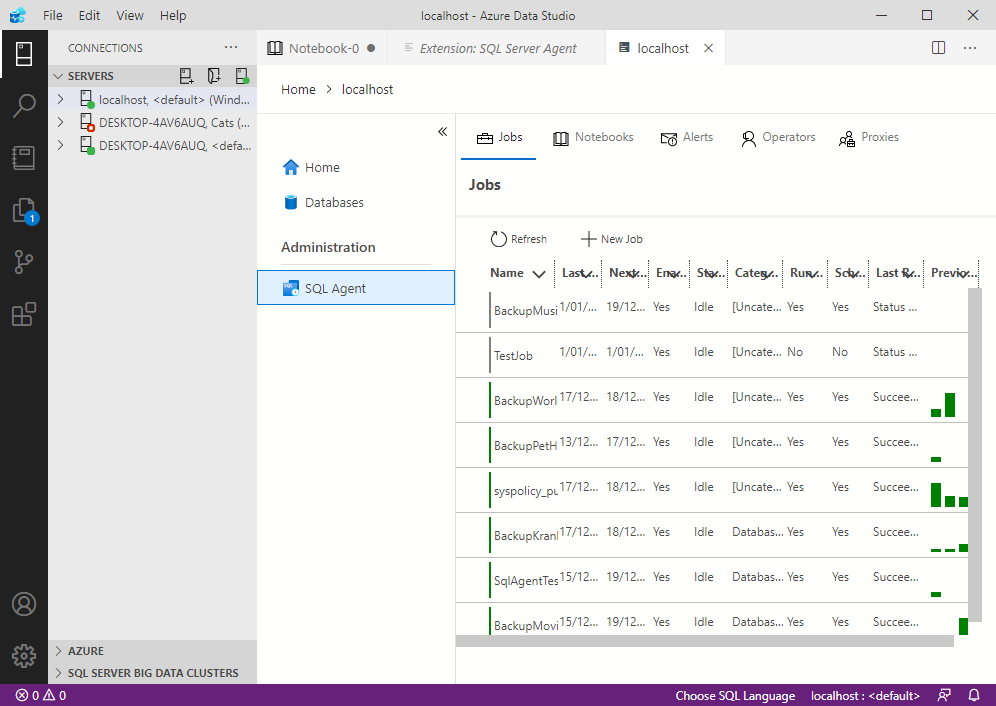
From here, we can see the SQL Agent option.
Click SQL Agent.
This opens the SQL Server Agent screen, where you can manage the SQL Server Agent jobs on the server: