SQL Developer is a GUI tool for working with Oracle Database. It’s available on many major operating systems, including Window, Linux, and of course, MacOS.
Here’s a quick rundown on the steps I took to install SQL Developer on a Mac.
Prerequisite
SQL Developer requires that you have Oracle JDK 8 or 11.
If you’re not sure whether you have the JDK or not, run the following command in a Terminal window:
javac -versionIf you do have it installed, you should see something like this, depending on the version:
javac 1.8.0_291
If the command doesn’t work, then you probably don’t have the JDK.
If you don’t have the JDK, you can download it from the Oracle website.
Once downloaded, open the .dmg file and follow the installer prompts.
Once that’s finished, you can continue with the steps below.
Download SQL Developer
Go to the SQL Developer downloads page.
Locate the Mac OSX option and click the Download link next to it:

When the prompt appears to accept the licence agreement, check the box and click the Download button:
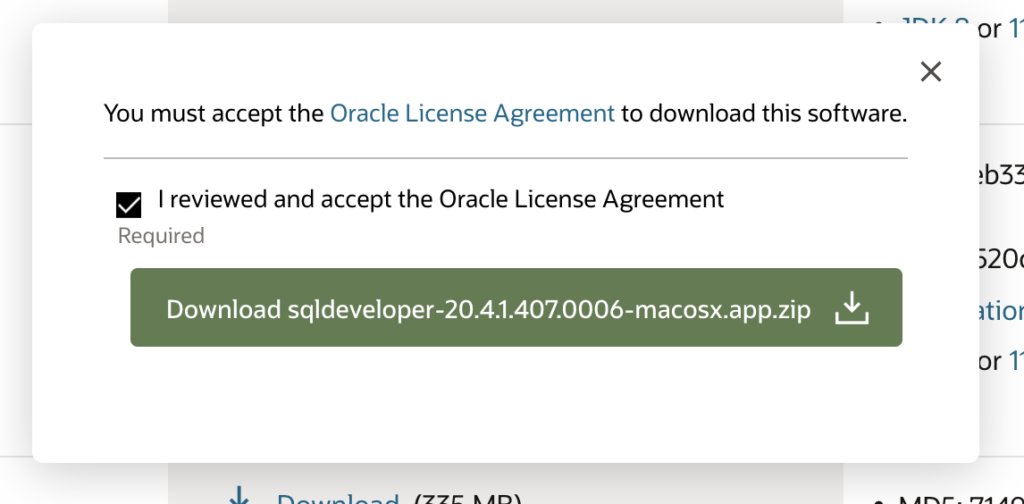
Once downloaded, the file has the same name as the one on the button. In my case, this was sqldeveloper-20.4.1.407.0006-macosx.app.zip.
Install SQL Developer
SQL Developer doesn’t require any special installation process. It can be run as soon as its extracted from the .zip file. However, if it was downloaded to your Downloads folder, you might like to move it to your Applications folder or another folder.
Open the .zip file:
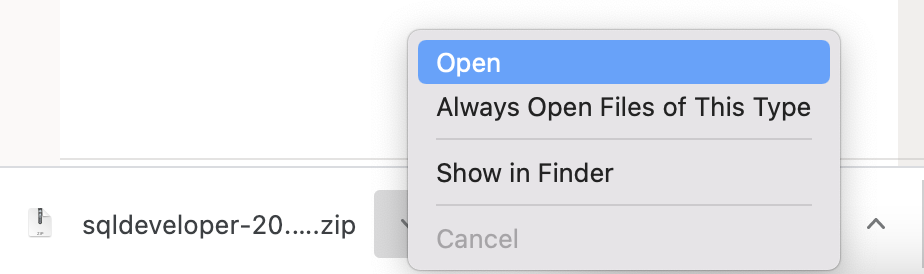
This extracts SQLDeveloper.app from the .zip file.
Drag the SQLDeveloper.app file to the Applications folder (or another folder if you prefer).
Launch SQL Developer
Double click the SQLDeveloper.app file to launch SQL Developer.
If you get a message telling you it can’t be opened, see this article for how to fix it.
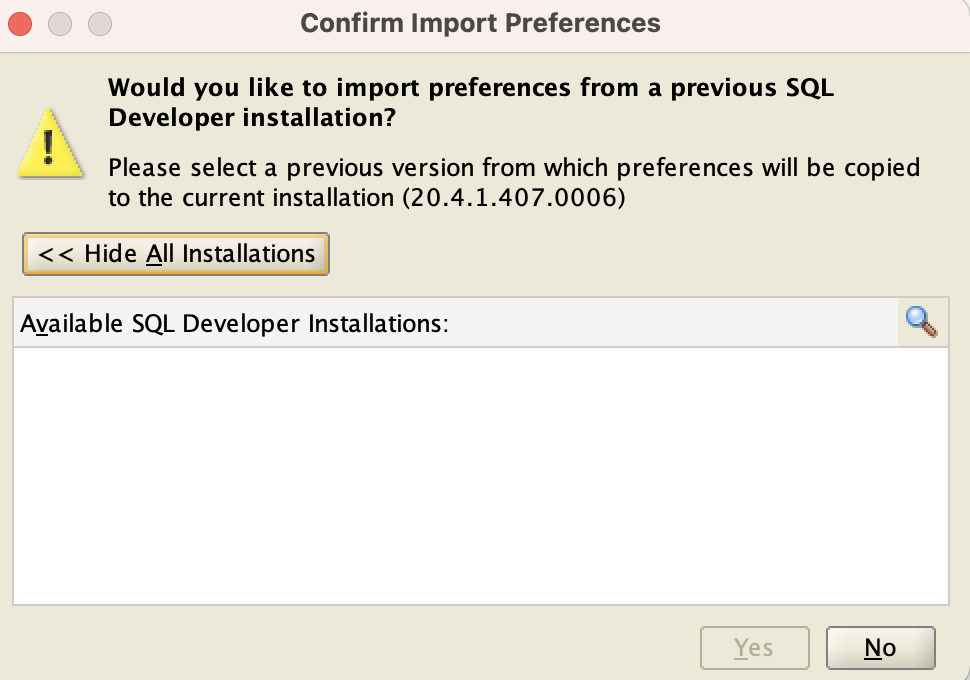
Otherwise, if the application launches OK, you may see the following prompt, in which case, click No if you don’t have any preferences to import:
SQL Developer now finishes launching. Once it has launched successfully, the GUI appears.
Here’s what the GUI looks like once it has launched:

Connect to Oracle
Now that SQL Developer is installed and running, you can can use it to connect to Oracle.
Click the green plus sign (or its adjacent down arrow and click New Database Connection...):
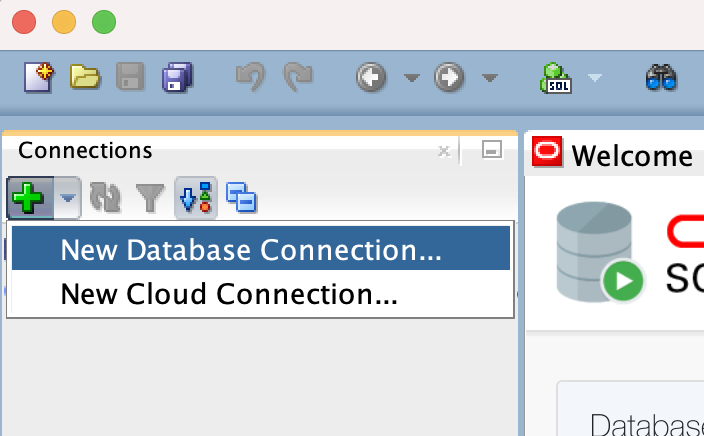
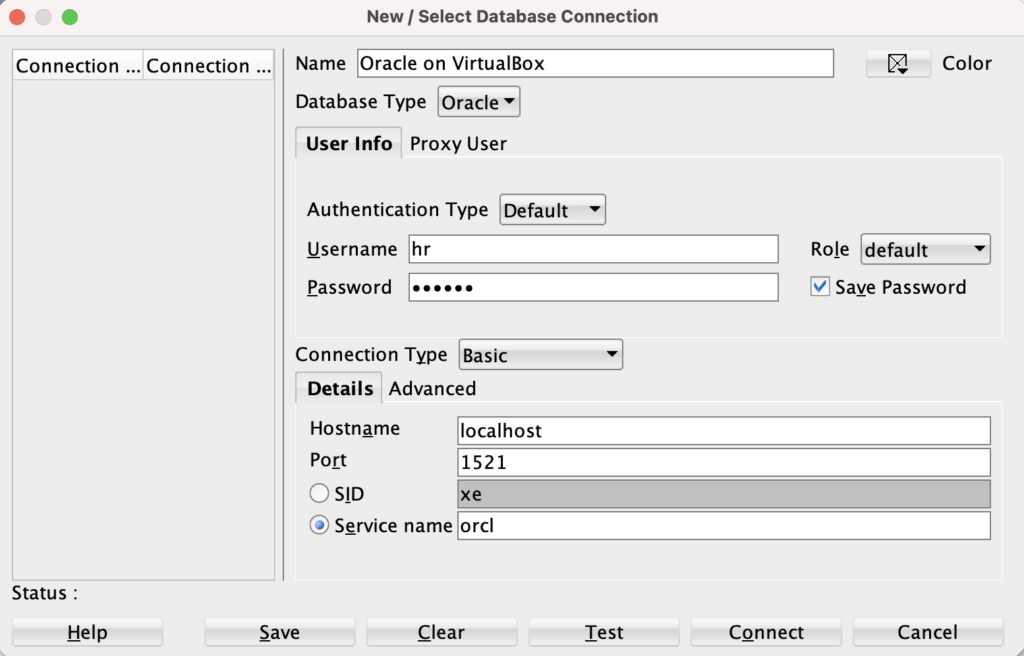
That launches the New / Select Database Connection screen.
Enter the details for your connection. If, like me, you have just installed the Oracle DB Developer VM, the following details should work:
| Name | Anything you want. I used Oracle on VirtualBox. |
| Username | hr |
| Password | oracle (also check the Save Password box if you want to save your password). |
| Connection Type | Basic |
| Hostname | localhost |
| Port | 1521 |
| SID/Service Name | Select the Service Name option, and use orcl as the value. |
Here’s what mine looked like:
You can click Test to see if it worked.
If it works, the little Status heading (bottom left) will get a Success message next to it.
If it was successful, click Connect.
Once connected, the connection is added to the connection list under Oracle Connections:
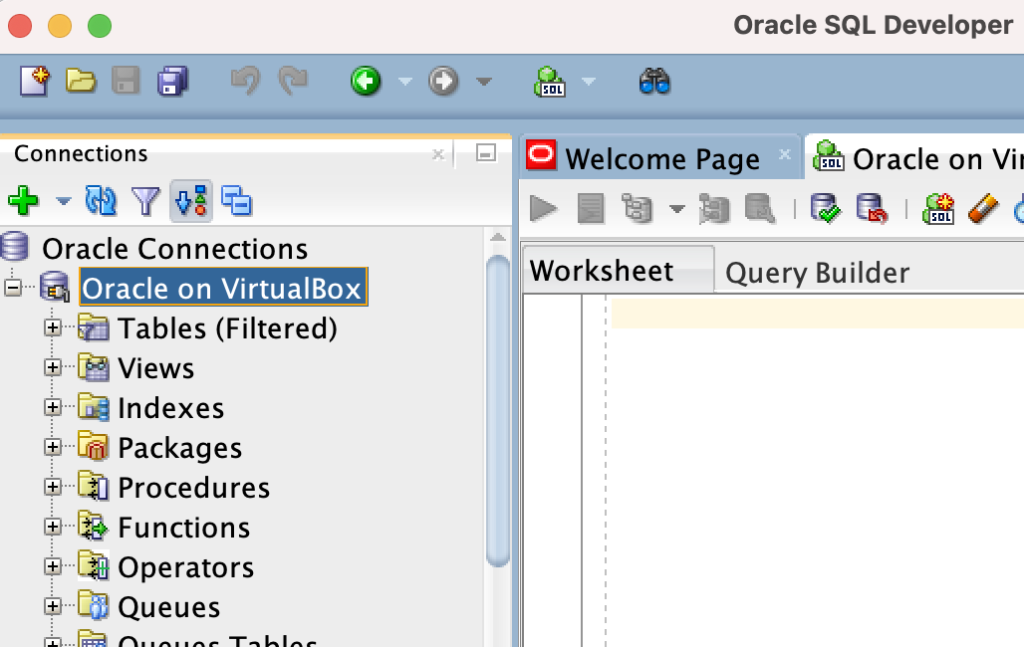
SQL Developer is now installed and connected to Oracle.
SQLcl
Installing SQL Developer also installs a copy of SQLcl. SQLcl is a command line interface for working with Oracle databases.
SQLcl can be launched by opening a Terminal window and entering the following:
/Applications/SQLDeveloper.app/Contents/resources/sqldeveloper/sqldeveloper/bin/sql hr/oracleIf you don’t have SQL Developer in the Applications folder, change the path accordingly.
The above command includes hr as the username, and oracle as the password. These credentials were created upon Oracle installation. You can use a different username and password as necessary.
You can also add SQLcl to your PATH variable to make it easier to launch.
For instructions on adding it to your PATH variable, see How to Install SQLcl on a Mac and jump to the “Add to PATH” heading. That article explains how to install SQLcl separately (in case you don’t install SQL Developer). You don’t need to download and install it again. Just skip to the PATH section.