This article demonstrates how to create a Database Mail account in SQL Server using the SQL Server Management Studio (SSMS) graphical user interface.
If you want to see how to do it using T-SQL, see How to Create a Database Mail Account in SQL Server (T-SQL).
This article assumes that you’ve previously enabled and configured Database Mail, and you’re now going in to add a new account.
If this is the first time Database Mail is being configured on your SQL Server instance, then use How to Setup Database Mail (SSMS) instead. That article goes through the actual steps of enabling Database Mail, adding a profile, account, etc. The process is similar, but there are a couple of extra steps involved when you first configure Database Mail.
Add the Account
From the Object Explorer, open the Management node and right click Database Mail:
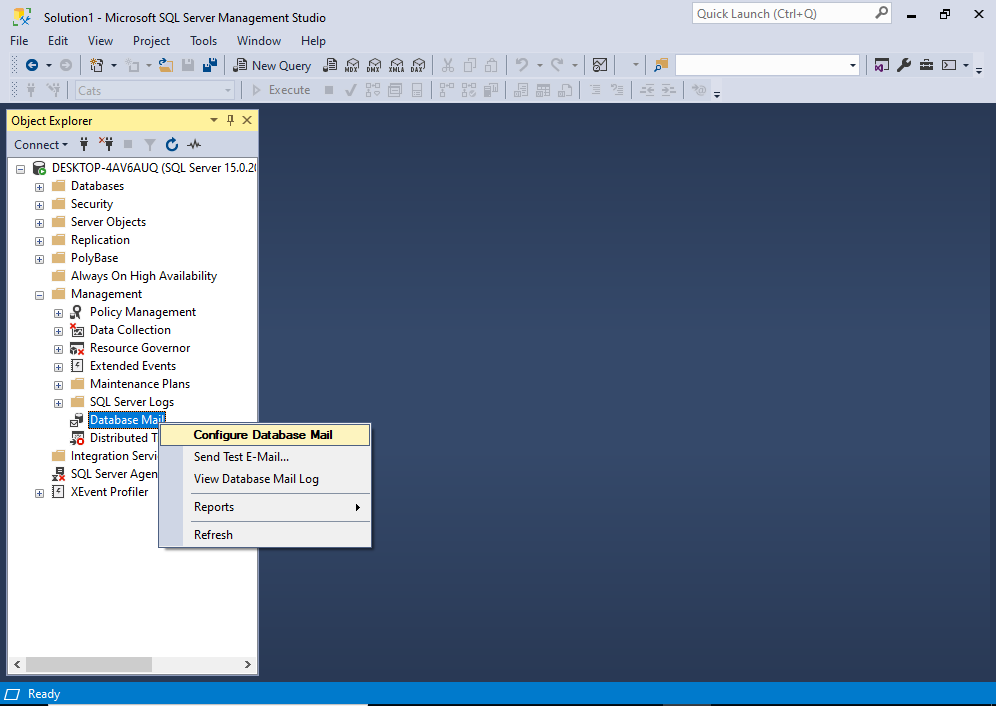
From the context menu, click Configure Database Mail.
You may get an interim “Welcome” screen before you get to the next one. If so, click Next > to continue to the following screen.
This opens the following screen:

On this screen, select Manage Database Mail accounts and profiles, then click Next >.
This brings us to the Manage Profiles and Accounts screen:
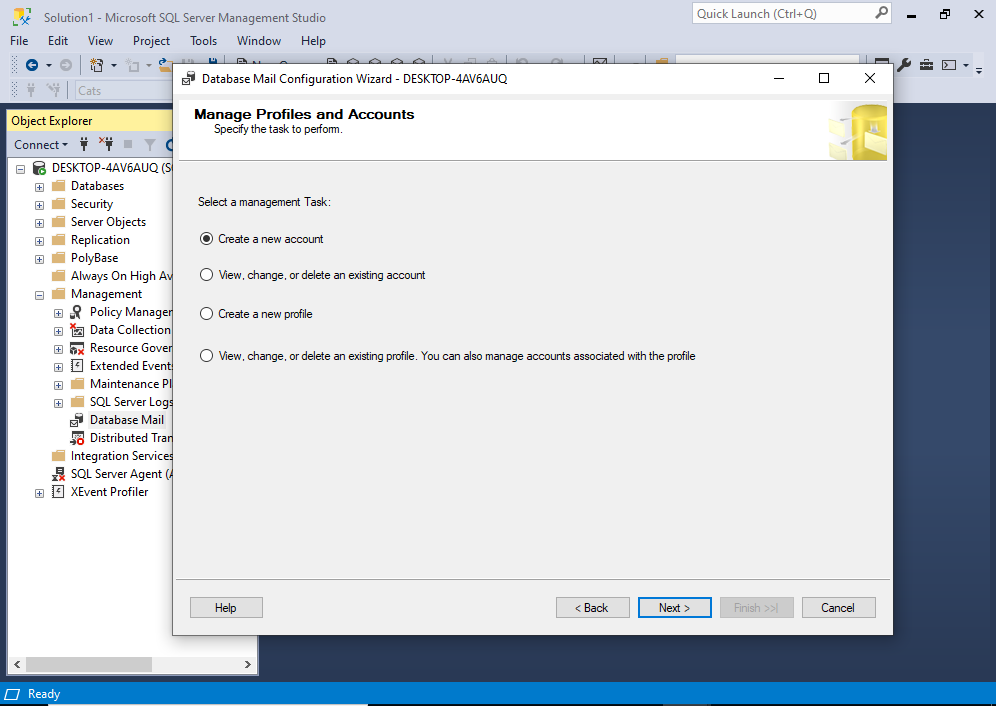
Leave the Create a new account option selected and click Next >.
The New Account screen opens:
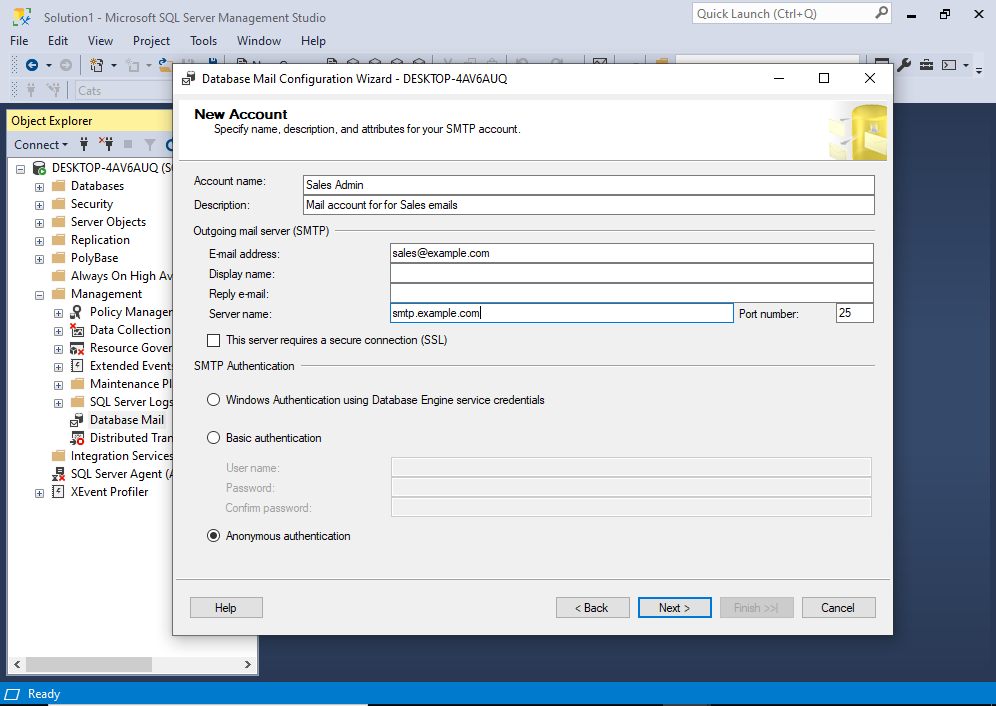
Enter the details for the new account. Be sure to use the correct SMTP server with the correct port. This is the outgoing mail server that will actually send the mail. If it requires authentication, enter those details also.
Once you’re done, click Next >.
The following screen appears to give you one last chance to review the details before it goes ahead and creates the account.
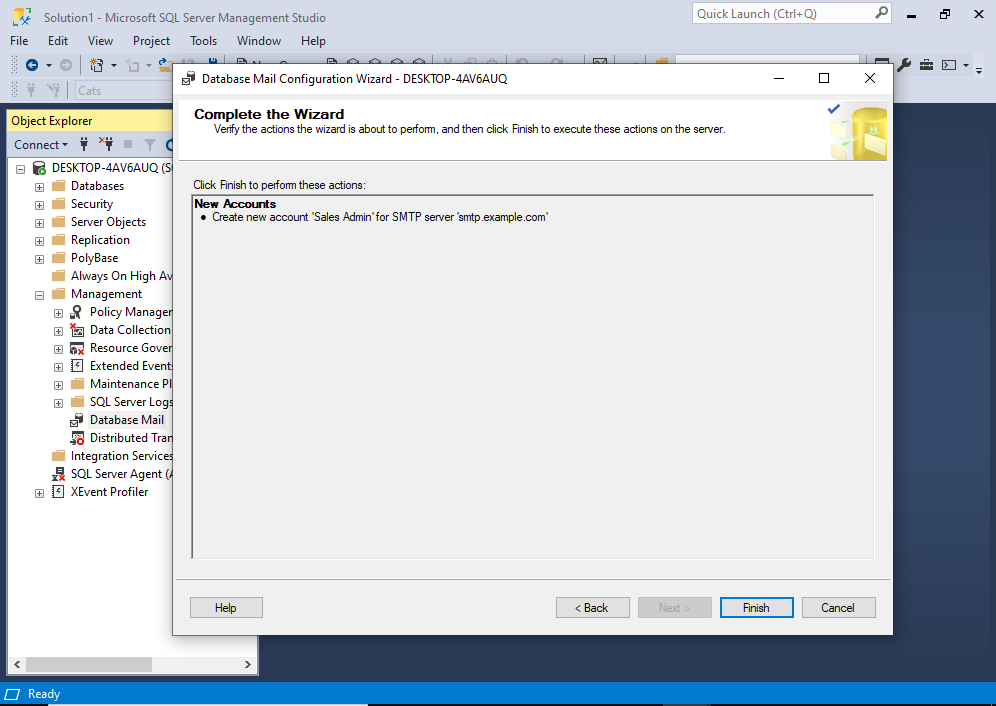
If it all looks good, click Finish.
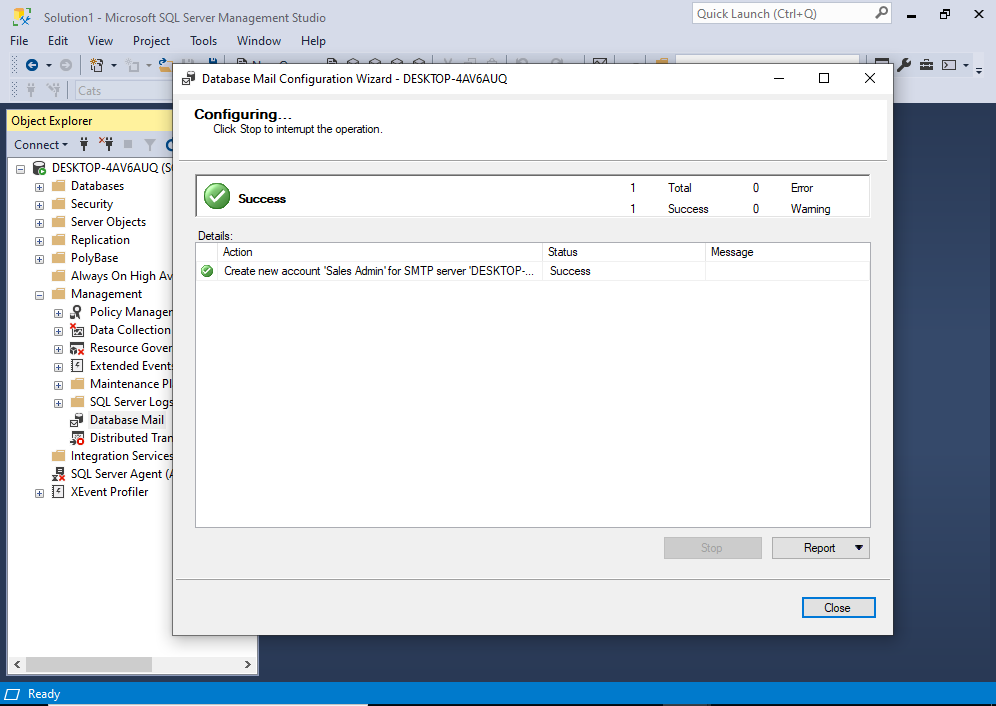
Database Mail will then go ahead and create the account. Once it’s done, you should see the Configuring screen, hopefully with “Success” popping out at you:
That’s it. All done. Your new Database Mail account has been created.
Click Close to finish.