This article shows you how to setup Database Mail for the first time on a new SQL Server installation.
As with many things SQL Server, you can configure Database Mail via the SSMS GUI, or you can do it using T-SQL code.
This article covers the SSMS GUI option. If you’re interested in the T-SQL option, see How to Send Email in SQL Server (T-SQL).
Configure Database Mail
The SSMS GUI gives us a nice, friendly wizard that walks us through the process of configuring Database Mail.
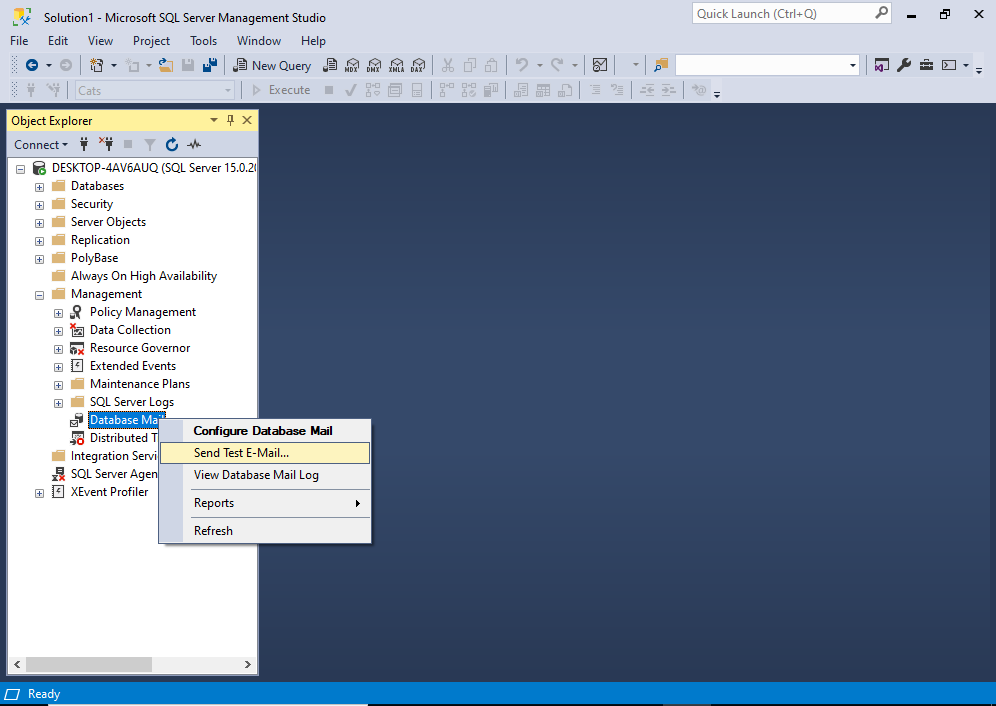
To start the wizard, use the Object Explorer to expand the Management node. Under this node, you should see the Database Mail option.
Right-click Database Mail to bring up the context menu:

Click Configure Database Mail from the context menu.
This opens a Welcome screen (unless you’ve previously done this and selected the “Skip this page in the future” option):
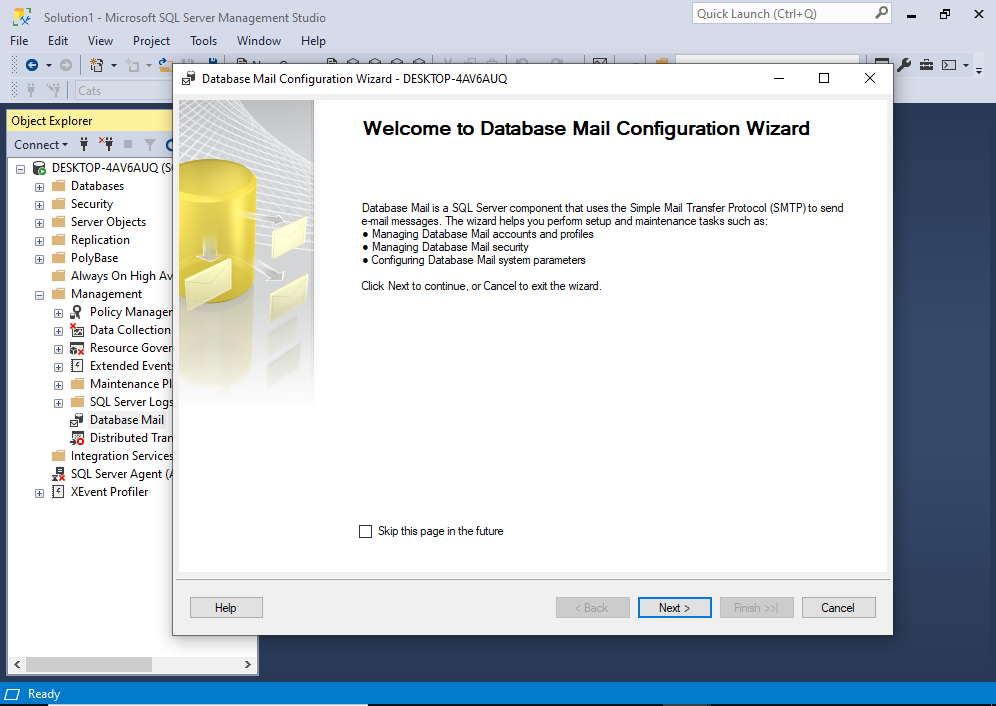
Click Next.
This brings you to the following window, where you choose what you want to do next:
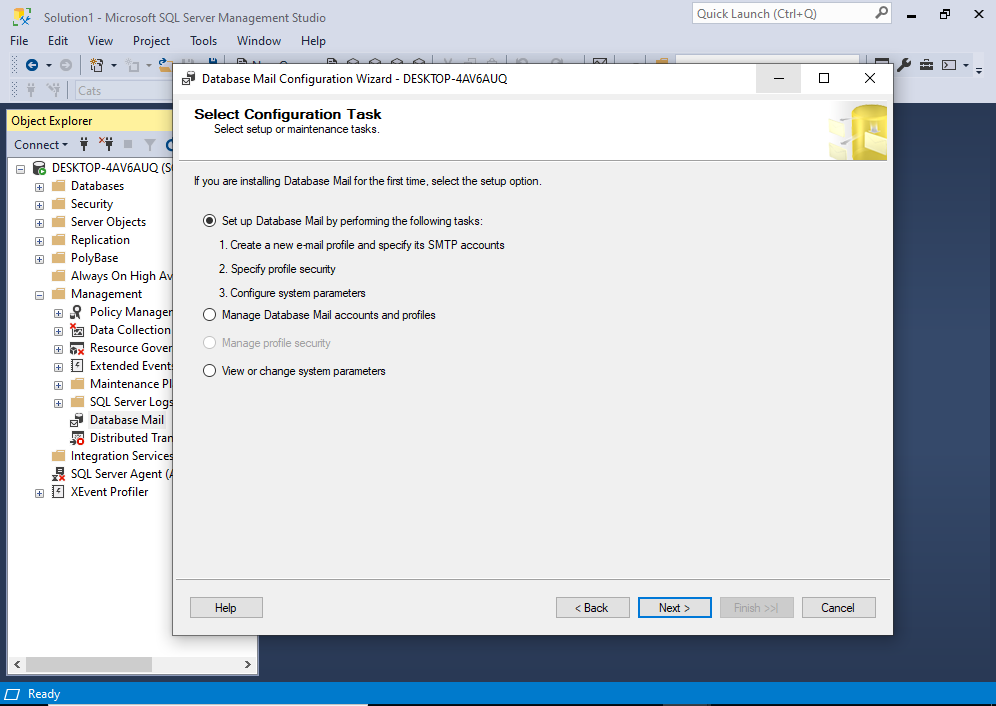
Leave the first option selected and click Next.
You may get the following prompt, asking if you’d like to enable Database Mail:
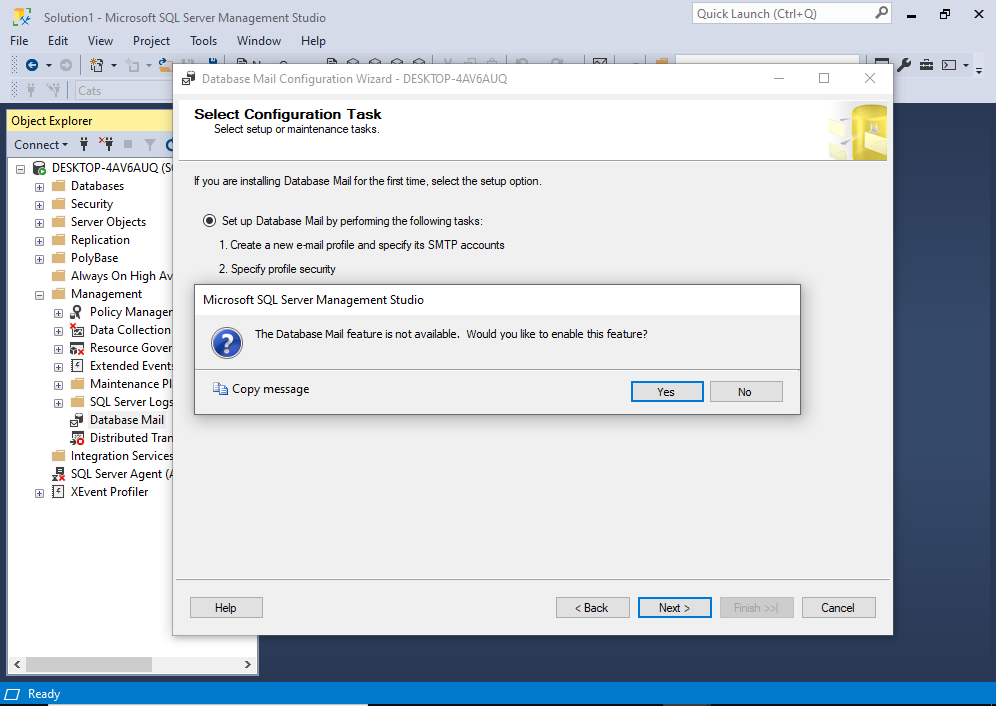
Click Yes.
The reason for this dialog box is that, by default, Database Mail is not enabled on a fresh SQL Server install. If you want to use Database Mail, you need to enable it the first time you configure it.
Therefore, you won’t see this dialog box on any subsequent visits to the Database Mail configuration wizard (unless you’re re-enabling Database Mail after having disabled it).
Anyway, we should now be on the New Profile screen:
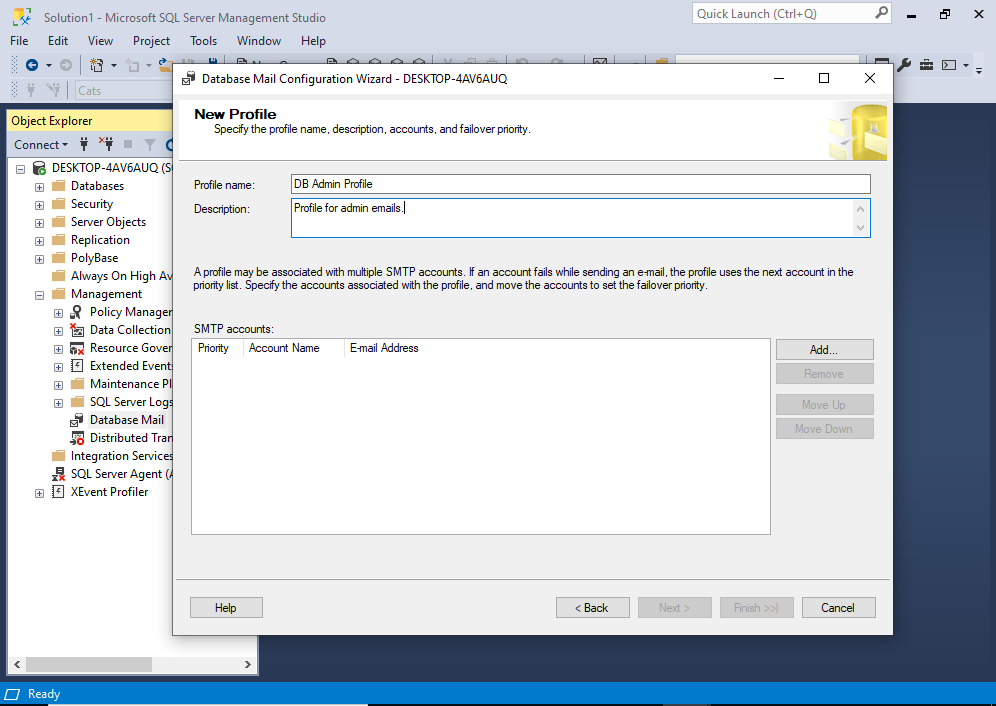
The way Database Mail works is, you create one or more profiles, and then add one or more accounts into those profiles.
This screen allows you to do both.
So go ahead and enter your profile details at the top, as well as a description, then click Add….
This will bring you to the New Account screen:
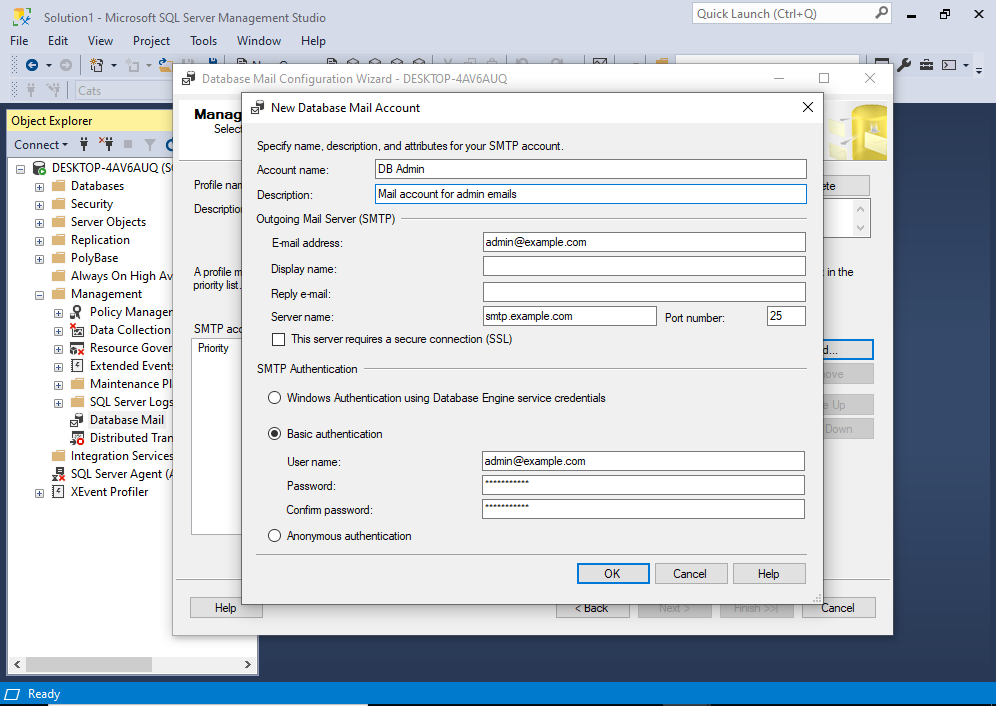
Enter account details as required. You’ll need to specify an outgoing mail server that works, and that you can authenticate against if required. Be sure to use the correct port. Common ports are 25, 465, and 587.
Click OK once you’ve entered the details.
This returns you to the Profile screen, except that it’s now called Manage Existing Profile instead of New Profile:
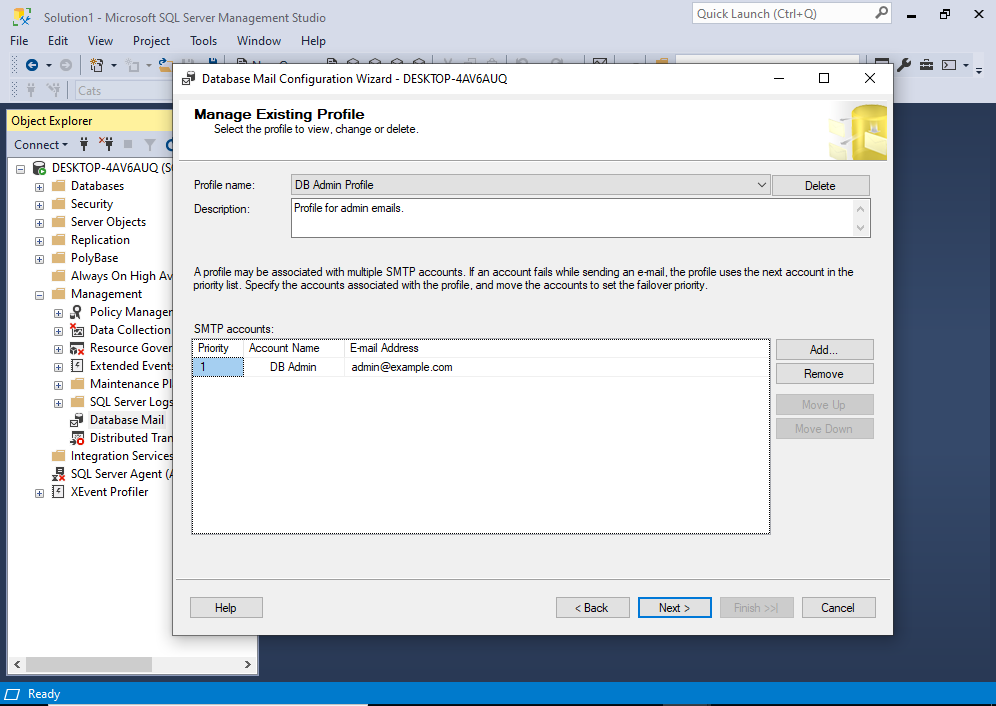
You’ll see your mail account in the list of SMTP accounts. You can add more accounts if required.
One of the benefits of profiles is that, when mail is sent, if one account fails for whatever reason, Database Mail will try the next one listed in the profile, and if that account’s no good, the next one, and so on.
But for now, click Next >.
That brings us to the Manage Profile Security screen:
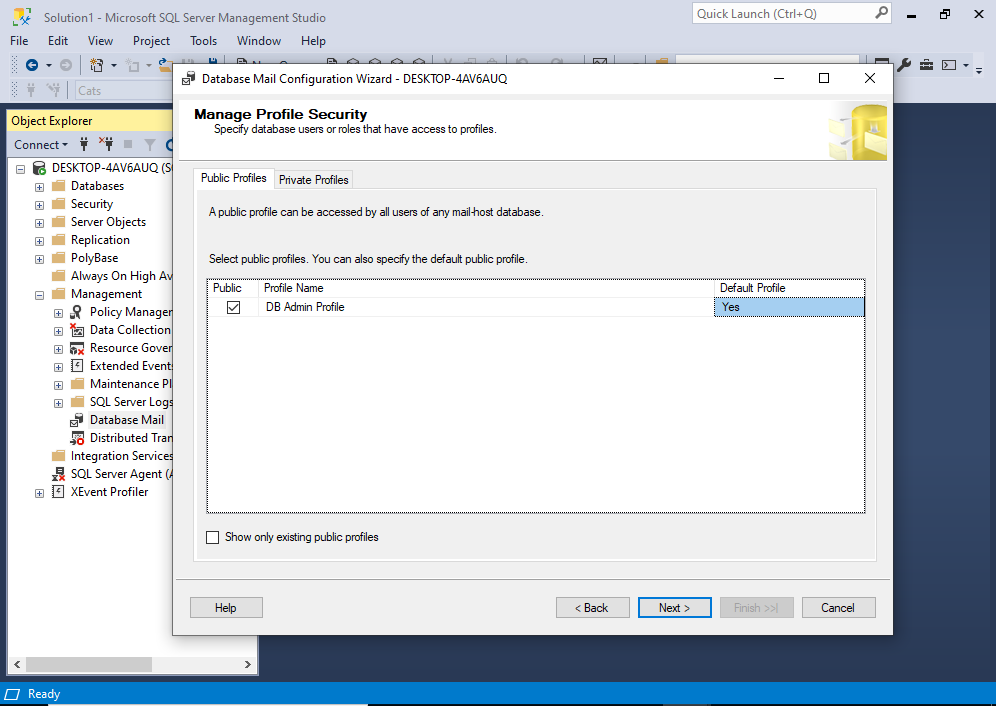
In my example I selected Public and Yes in order to make it a the default public profile.
However, whether you select this option will depend on your circumstances.
A public profile allows any user with access to the msdb database to send e-mail using that profile. A private profile can be used by a user or by a role.
Making this the default profile means that, if someone tries to send mail without specifying which profile to use, this profile will be used. However, it will first try to use the default private profile for the current user. If the user does not have a default private profile, it will use the default public profile.
So basically, what we did here was elect this profile to be the backup profile to the backup profile.
Anyway, once you’ve done whatever you needed to do at this screen (if anything) click Next >.
Now we get the Configure System Parameters screen:
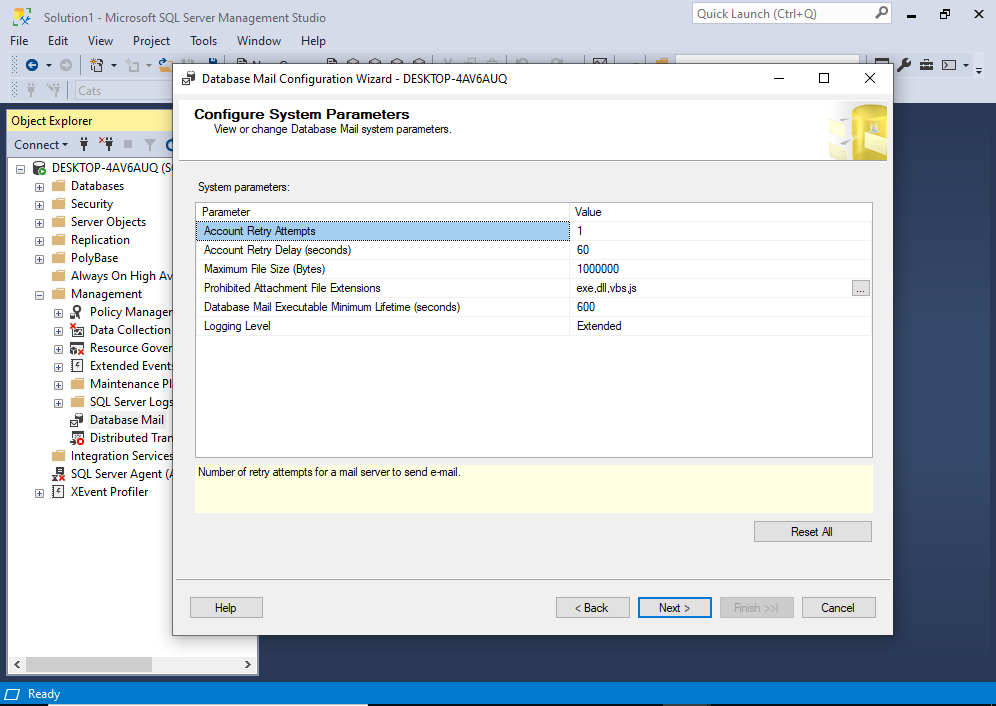
Most of these parameters are reasonably self explanatory. Feel free to change anything you need changed, then click Next >..
Almost done – it’s the Complete the Wizard screen:

If it all looks good, click Finish.
The wizard finally goes ahead and actually does the configuration. It will go through each step and return its status:

Hopefully you’ll see “Success” written all over it like we see here.
That completes the setup of Database Mail.
Send a Test Email
At this stage, you’ll probably want to send yourself a test email, just to confirm that everything is working OK.
You can do that back at the Object Explorer by right clicking on Database Mail and clicking Send Test E-mail….
This will launch a dialog box that you can use to enter the recipient email address, as well as a subject and body text (of which Database Mail pre-populates with sample text):
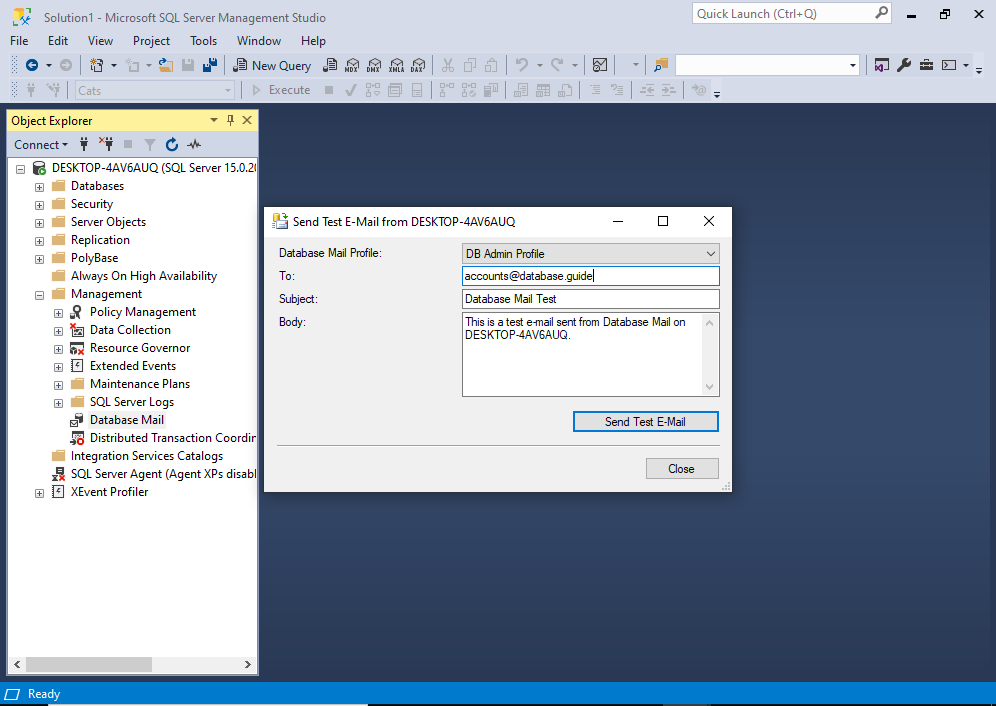
Once you’ve entered a recipient and (optionally) the other details, click Send Test E-Mail.
This results in the following dialog box:
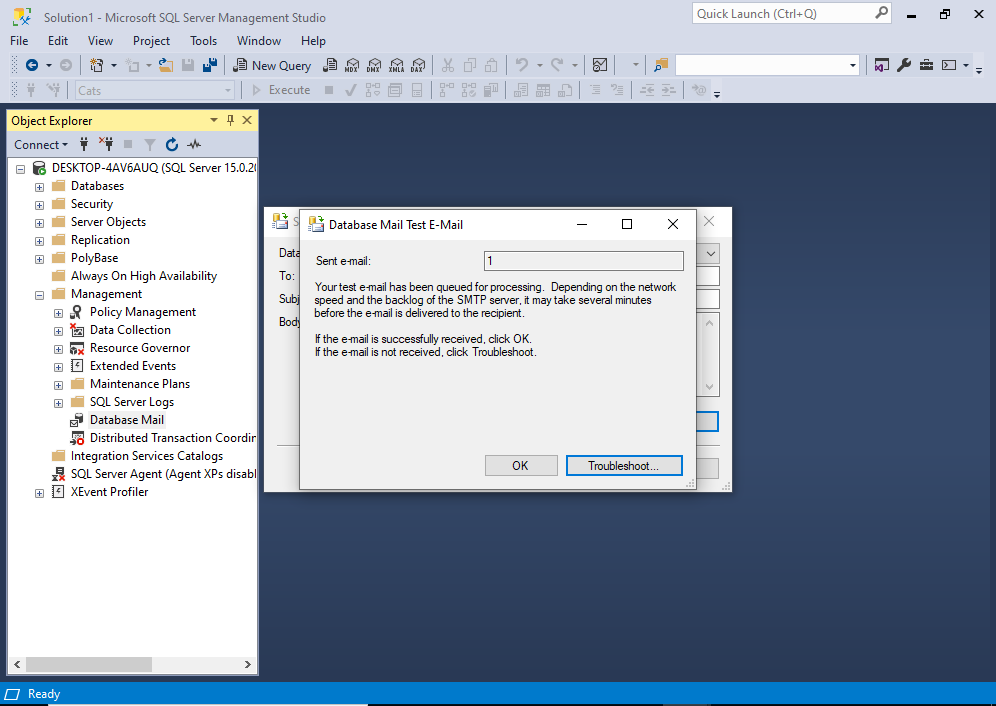
Hopefully you will receive the email at the designated email address.
Note that, just because we set up Database Mail, doesn’t mean that the mail will necessarily be sent. There could be any number of problems between Database Mail, the SMTP mail server, and the receiving mail server. For example, if you didn’t provide the correct authentication for the mail server, the mail won’t be sent.
You can always take a look at the log file viewer, by right-clicking on Database Mail and selecting View Database Mail Log.

Other things you can do is run the following scripts:
- Check the status of the mail queues
- Check how many mail items are in the queue
- See a list of failed emails
Permissions
To configure Database Mail you must be a member of the sysadmin fixed server role. To send Database Mail you must be a member of the DatabaseMailUserRole database role in the msdb database.