The following steps demonstrate how to install PostgresSQL on Ubuntu 18.04.
There are a couple of ways to go about installing Postgres on Ubuntu.
But before we start jumping in and installing it, did you know that by default, PostgreSQL is already available in Ubuntu 18.04?
So one option is to go right ahead and use the version that’s already included with Ubuntu.
But unless you have reason not to, you will probably want to run the latest version of PostgreSQL, in which case you’ll want to download and install the latest version.
This tutorial covers both options.
Check your Current PostgreSQL Version
It doesn’t hurt to check your current Postgres version before you go installing anything.
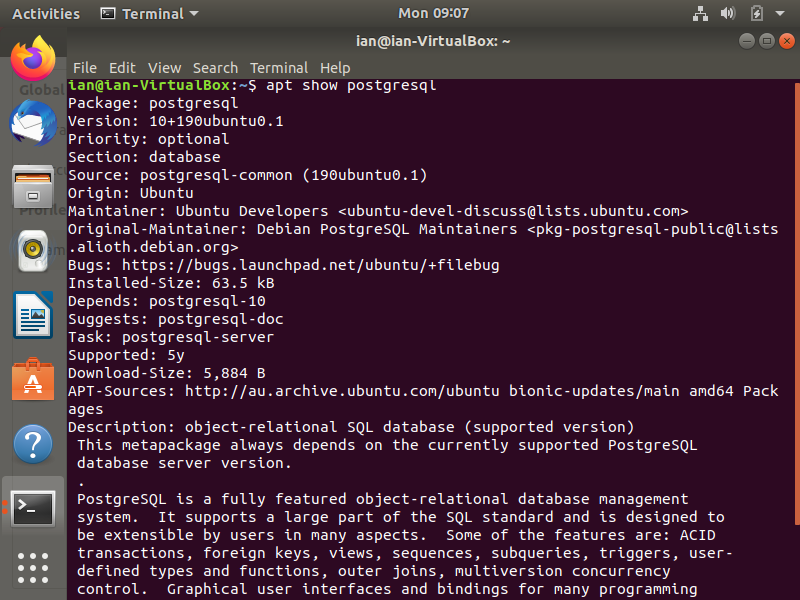
Open up your Terminal and run the following command:
apt show postgresqlExample result:

Here, my local Ubuntu install has the Postgres version 10 package. At the time of running this example, PostgreSQL 13 is available (Postgres 13.1 to be precise).
So I’m going to go ahead and install the latest version.
Install the Latest Version of PostgreSQL
To install the latest version of PostgreSQL, use the PostgreSQL Apt Repository. You can do that by following the steps below.
Create the file repository configuration:
sudo sh -c 'echo "deb http://apt.postgresql.org/pub/repos/apt $(lsb_release -cs)-pgdg main" > /etc/apt/sources.list.d/pgdg.list'
Import the repository signing key:
wget --quiet -O - https://www.postgresql.org/media/keys/ACCC4CF8.asc | sudo apt-key add -Update the package lists:
sudo apt-get updateInstall PostgreSQL:
sudo apt-get -y install postgresqlThe latest version of PostgreSQL is now installed on Ubuntu 18.04.
Once it has been installed, the details of your PostgreSQL installation is displayed. You’ll see things like version, port, the data and log directories, etc
The above command installs the latest version of PostgreSQL. If you want to install a specific version, append postgresql with a hyphen, followed by the version number, like this: postgresql-13.
The PostgreSQL Apt Repository integrates with your normal systems and patch management, and provides automatic updates for all supported versions of PostgreSQL throughout the support lifetime of PostgreSQL.
How to Install the Local PostgreSQL Version (Option 2)
If you prefer to install your local version of PostgreSQL, you can do so with the following command:
sudo apt install postgresql postgresql-contribThat’s all there is to installing your local version of PostgreSQL on your Ubuntu 18.04 machine.
Connect to PostgreSQL
You can connect to PostgreSQL by running the following command:
sudo -u postgres psqlThat command uses the postgres user to connect via the psql command-line utility.
After running that command, you should see something like this:
psql (13.1 (Ubuntu 13.1-1.pgdg18.04+1))
Type "help" for help.

postgres=#
That means you’ve successfully connected to PostgreSQL with the psql utility.
You can now create databases, run queries, run psql commands, etc.
For example, you could run the following psql backslash command to get information about your current connection:
\conninfoRunning that command should return something like this:
You are connected to database "postgres" as user "postgres" via socket in "/var/run/postgresql" at port "5432".
By default, PostgreSQL creates a postgres user and a corresponding postgres database.
When you connect using the postgres user, by default, you’re connected to the postgres database.
You can also connect to Postgres using GUI tools such as PgAdmin, DBeaver, Azure Data Studio (using its PostgreSQL extension).
To install Azure Data Studio, see How to Install Azure Data Studio on Ubuntu 18.04.