If you’re a Mac developer, setting up SQL Server locally is probably starting to feel like more trouble than it’s worth. Between workarounds like Docker, virtual machines, and third-party tools, just getting a working SQL Server environment on macOS is not exactly your run-of-the-mill installation.
Add to that Microsoft’s announcement to retire SQL Edge in September 2025 (SQL Edge was our only hope of installing SQL Server on a Mac without using a virtual machine), not to mention the impending retirement of Azure Data Studio in Feb 2026 (which we could use to connect to SQL Server), and you may start to wonder whether you should drop the whole idea of using SQL Server altogether.
The good news is you don’t actually need to install SQL Server in order to build, test, or manage SQL-based applications. Azure SQL Database provides a fully managed, cloud-based version of SQL Server that works seamlessly from macOS.
So this provides us Mac users with another option. And it could very well be the best option. Never again will we need to mess around trying to install the latest version of SQL Server on our machine.
The Free Tier
The best part is that you can do it for free. If you use the Azure SQL Database free tier, you’ll never have to pay any monthly fees (or any other fees, for that matter), unless you explicitly configure it to do so.
The free tier is perfect if you want to use SQL Server to learn, develop, and prototype SQL-based applications at no cost. There are limits to the free resources, so this option might not be suitable for everyone. But it’s definitely an option worth considering if you only need SQL Server for some light dev work, or for playing around and learning stuff.
Once set up, connecting to it is basically the same as connecting to a local SQL Server installation. You can use your local tools like VS Code, DBeaver, or sqlcmd to connect in just the same way you’d connect to SQL Server or any other database.
This article walks through the steps that I used to get started with Azure SQL Database from my Mac. It also includes the steps for connecting via the command line (using sqlcmd) and through a GUI (using VS Code).
Setting Up Azure SQL Database Free Tier
Setting up the Azure SQL Database free tier involves creating an Azure account, then taking advantage of the SQL Database free tier offer.
Actually, as part of the signup process, we’ll also get a 30 day free offer for Azure in addition to the free lifetime offer for SQL Database. So we’re getting two free things:
- An Azure account with a 30 day free offer, which provides access to 12-month free services, including $200 credit to use on any Azure service.
- Azure SQL Database free tier offer. This allows us to create up to 10 General Purpose databases. The database is free forever (with monthly limits).
We’re only interested in the second offer here. This is what enables us to work with SQL Server (Azure SQL Database) on our Mac without having to worry about upgrades or configuration issues with Docker or virtual machines, etc. As long as we remain within the monthly limits, it will be free forever. And the default configuration prevents us from accidentally going over the monthly limits. In other words, it’s free forever by default.
If this sounds good to you, read on.
1. Create an Azure Account
Go to Microsoft’s Azure page:

Click the “Get started with Azure” button (or similar, if it changes in the future). Clicking this link took me to a page that allows me to choose an Azure account:

Click “Try Azure for free”. This took me to the Microsoft Sign-in page:

Sign in with your existing Microsoft account (or create one if you don’t already have one). Once signed in, the “Create your Azure free account” page loads. Enter your details (such as name, address, etc):

Once completed and submitted, I was taken to a page that asked for my credit card details:

Don’t be alarmed when you see “free for 12 months”. The “12 months” doesn’t refer to the free database tier. The free database tier doesn’t expire (as long as you keep the Azure subscription). As mentioned, there are two “free” things we’ll be getting:
- Azure 30 day offer: We’re getting the free Azure 30 day offer (which includes 12 months free for various services).
- Free Azure SQL Database tier: Second (and most importantly for us), we’ll be getting the free SQL Database tier. We get this by applying the offer at the time of creating a database (therefore, we’ll do this later).
The free database offer is free forever, as stated on Microsoft’s Azure SQL Database free offer FAQ:
The database is free forever, with monthly limits. There’s no time limit.
Monthly usage limits are: 100,000 vCore seconds, 32 GB of data storage, and 32 GB of backup storage per free offer database. Each subscription can include up to 10 databases, and the same limits apply to each database individually.
The credit card is required, even if when using the free plan with no intention of paying for anything. Microsoft’s reasoning for this is that it’s used for identity verification purposes. Importantly, as the message states, you won’t be charged unless you move to pay-as-you-go pricing.
Once you’ve submitted those details you may or may not be prompted to enable 2 factor authentication on your account.
Next, I was welcomed by the “Welcome to Azure” page:

Clicking “Get started” brought me to a very short (optional) survey page that asks how I want to use Azure. You can skip this if you want. After that there’s the option of taking a tour that shows you how to get started. You can click “Start the tour” or “Skip”.
In any case, clicking “Start the tour” led me to the Azure portal (which is where the next step starts).
2. Create Azure SQL Database (Free Tier)
This is where we create our free Azure SQL database (the first of 10 potentially free databases we can create).
Go to the Create SQL Database page on the Azure portal.
If for some reason that link doesn’t work, try going to the Azure portal “Home” and clicking the “SQL Databases” option. Alternatively, use the top search box to search for “SQL Database”, then select “SQL Databases” and follow the prompt to create the database. This should bring you to the “Create SQL Database” page (as if you’d clicked the above link).
Anyway, once you’re on the “Create SQL Database” page, you should see an offer that starts off with “Want to try Azure SQL Database for free?”. Something like this:

Click “Apply offer”
Fill in the details:
- Subscription: Your free subscription (this will probably already be selected)
- Resource group: Click “Create new” to create a new resource group. All you need to do is provide a name. I used “FreeSQLResourceGroup”. Alternatively, you can select an existing resource group if you’ve created one previously.
- Database name: Choose a name (e.g., “FreeSQLDatabase”)
- Server: Click “Create new”
3. Create SQL Server
After clicking “Create new” for the server, the following screen appears:

Complete this form. For example:
- Server name: Choose a unique name (e.g., “yourname-dev-server”)
- Location: Select a suitable region. If it doesn’t accept your selection, choose one near your location.
- Authentication method: Choose an option. If you don’t have Microsoft Entra Authentication configured, choose “Use SQL authentication” for now.
- Server admin login: Create a username
- Password: Create a strong password (save this!)
- Click “OK”.
4. Check Database Details
If you arrive back at the main database creation screen:
- Leave the Compute + Storage options at the default.
- Keep the “Behavior when free offer limit reached” setting at “Auto-pause the database until next month”
- Keep the “Backup storage redundancy” at its default setting.
- Click “Next: Networking”
When I did the process again later, it skipped this step and took me straight to the Networking screen.
5. Configure Networking Rules
The Networking screen looks like this:

If you don’t have any specific requirements, the following should suffice:
- Select “Public Endpoint” under the “Connectivity method” option. This reveals the “Firewall rules”
- Under “Firewall rules”, click “Yes” to “Allow Azure services and resources to access this server” and “Add current client IP address”. This allows your Mac to connect.
- Click “Next: Security”
6. Configure Security Rules

Leave these at the default. Click “Next: Additional settings”
7. Additional Settings

It’s OK to leave these at the default, but you can change if you prefer. For example you can select the Sample database if you want a sample database to play with. The sample database is AdventureWorksLT (at least, it was when I checked).
Select “Next: Tags”.
8. Tags
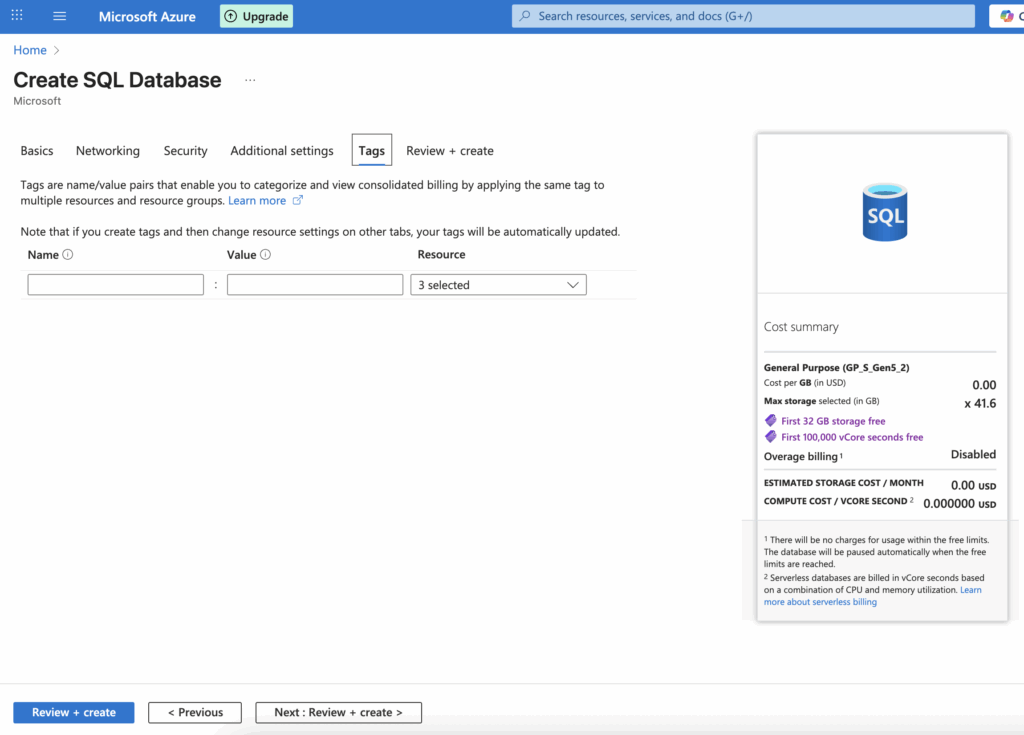
Select “Next: Review and Create”.
9. Review and Create
Finally, we get to the last screen before the database is actually created:
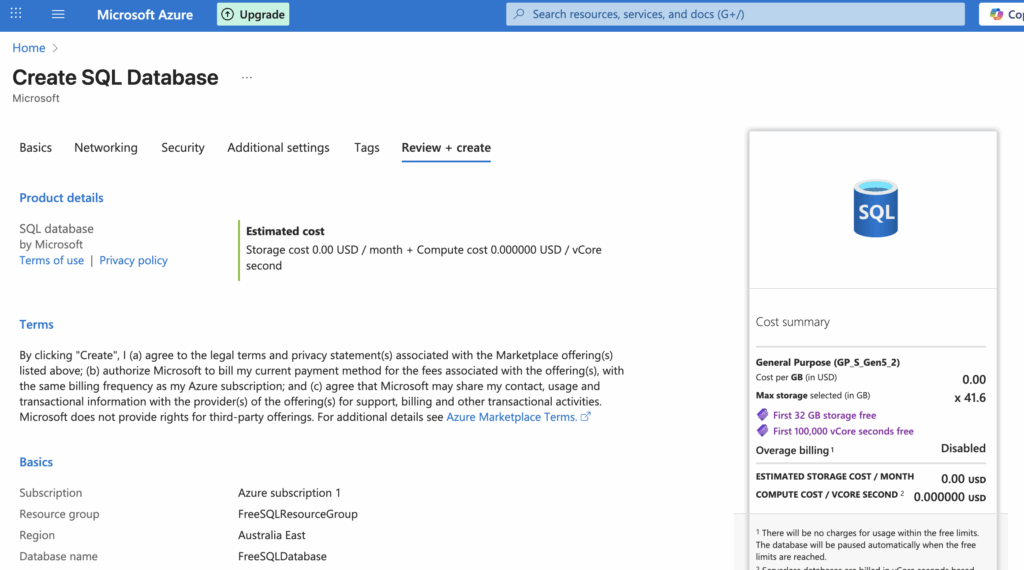
Scroll down this page to check all details:

If everything looks good, click “Create”.
This starts the deployment process. Keep your screen open while this is in progress. Once complete, you should see something like this:

That’s it – your free database has now been created.
Go ahead and click the “Go to resource” button to see the details of your deployment.
Connecting from Your Mac
Now that we’ve set up our SQL database, let’s go ahead and connect to it.
We have many options for doing this. Feel free to use your preferred tool to connect. For this article, we’ll use two options: a command line option and a GUI option.
Option 1: Using Command Line Tools (sqlcmd)
For the command line option, we’ll install sqlcmd (which is part of mssql-tools). Basically, mssql-tools includes sqlcmd and bcp (which is a bulk copy program). So to get sqlcmd, we’ll install mssql-tools.
We’ll do this using Homebrew. This is a handy package manager that helps you install applications quickly and easily. If you don’t have Homebrew, you can install it by running the command provided on the Homebrew homepage.
Install SQL Server Command Line Tools
Assuming you have Homebrew, run the following:
brew tap microsoft/mssql-release https://github.com/Microsoft/homebrew-mssql-release
brew update
HOMEBREW_ACCEPT_EULA=Y brew install msodbcsql18 mssql-tools18
This installs version 18. You can check the Microsoft’s help page for installing the command line tools for the latest version.
After installation, you can check that everything is OK by running the following:
sqlcmd '-?'This should return details about the program, including its version number, as well as help on usage. If you see a different version number, it’s likely that you already had an earlier version installed outside of Homebrew.
If this happens, you can update your shell’s PATH to prioritize Homebrew binaries. For zsh, add this to your ~/.zshrc:
export PATH="/opt/homebrew/bin:$PATH"Then reload your shell:
source ~/.zshrcConnect and Query Your Database
Test your connection:
sqlcmd -S yourserver.database.windows.net \
       -d dev-test-db \
       -U 'yourusername' \
       -P 'yourpassword' \
       -N -C \
       -Q "SELECT @@VERSION"
I enclosed the username and password in quotes here, because this prevents any special characters from messing things up. I used backslashes in order to format the command across multiple lines. You can omit these if you want to condense it to a single line.
Also, if you’re concerned about security (e.g., password in terminal history), consider omitting the password option altogether. When you do this you’ll be prompted for the password each time you connect.
Don’t be surprised if you get an error like this when you first run the above command:
Sqlcmd: Error: Microsoft ODBC Driver 18 for SQL Server : Login timeout expired.
Sqlcmd: Error: Microsoft ODBC Driver 18 for SQL Server : TCP Provider: Timeout error [258]. .
Sqlcmd: Error: Microsoft ODBC Driver 18 for SQL Server : Unable to complete login process due to delay in login response.
Chances are, it’s because your database is currently paused. If you jump over to your portal, you might be quick enough to see it change status to “Resuming” and then “Online”. If this happens, wait a few seconds and run the command again.
When I ran the command (for the second time, after getting the above error), the following was returned:
------------------------------------------------------------------------------------------------------------------------------------------------------------------------------------------------------------------------------------------------------------------------------------------------------------
Microsoft SQL Azure (RTM) - 12.0.2000.8
	Jul  3 2025 16:52:14
	Copyright (C) 2025 Microsoft Corporation


(1 rows affected)
That shows that I successfully connected to my SQL database.
If you still have problems connecting, try checking in the portal that your current IP address is allowed. You can configure this under the “Firewall rules” heading in the Security > Networking section.
We have now successfully set up the Azure SQL Database free tier, installed SQL command line tools, and connected to our SQL database.
Option 2: Using VS Code
This assumes you have VS Code installed. If not, head over to the VS Code download page where you can download and install it. Once installed, you can continue with the steps outlined below to install the SQL Server (mssql) extenstion.
Install Required VS Code Extensions
Open VS Code and install the SQL Server (mssql) extension. To do this:
- Go to Extensions by using
Cmd+Shift+X(or by clicking the Extensions icon in the activity bar on the side of the window) - Search for “SQL Server (mssql)”
- Install the official Microsoft extension

Connect to Your Database
Now that the SQL Server (mssql) extension is installed, let’s go ahead and connect to Azure.
- Open Command Palette: Press
Cmd+Shift+P(or select “View > Command Palette…” from the top menu) - Add Connection: Type “MS SQL: Add Connection” and select it.
This should eventually result in the “Connect to Database” screen appearing:

Go ahead and fill in the connection details. For example:
- Profile Name: Give it a name like “Azure Dev DB”
- Connection Group: It’s fine to leave it at the default (Connection Group is just a way to organize your saved connections within the SQL Server extension in VS Code).
- Input type: Parameters
- Server name:
yourname-dev-server.database.windows.net - Trust server certificate: Leave it unchecked.
- Authentication Type: Select “SQL Login”
- User name: Your admin username
- Password: Your admin password
- Save Password: Choose “Yes”
- Database name:
dev-test-db - Encrypt: Strict
The above settings are what I used for this tutorial. You may need to use different settings if you have a reason to do so.
Once done, click “Connect”.
Once connected, you should be able to see the Azure connection in the Connections pane in VS Code:

Run Queries
You can now write queries agains your Azure SQL Database.
To run a query, right click on the Azure database and select “New Query”:

That opens a new query tab. In the query tab, run a simple SQL query to test it out.
For example:
SELECT @@VERSION as SQLVersion;To run the query, click the triangular “Execute Query” button at the top.
Here’s what I got:

Congratulations, you have now set up a free Azure SQL database and connected to it from your Mac. As mentioned, Azure SQL Database uses the SQL Server engine, and so using it like this will feel just like running SQL Server on your local machine.
Beware of the vCore Seconds!
The free database tier gives us 100,000 vCore seconds, which may sound a lot, until you do the calculations. There are 86,400 seconds in a day. So if you use a single vCore, then it will take just over a day to use up your free vCore seconds. That assumes that your database is online (not paused). If you use two vCores then your vCore seconds will be used up in less than a day. This will depend on your min vCores and max vCores, and to what extent each one is being used. But the point is, your vCores could disappear very quickly if you’re not careful.
On a positive note, the free tier auto-pauses the database after 1 hour of inactivity. But the auto-pause won’t work if there’s a connection to the database.
So I highly recommend that you disconnect your sessions once you’re done. And to be on the safe side, close the actual tool (for example, close the Mac Terminal if you used sqlcmd to connect). If you leave them connected, it will chew through your free vCore seconds. And if you leave it connected overnight, you might just wake up to find all your free vCore seconds gone.