Here I’ll show you how to install SQL Server on a Mac with VirtualBox running Windows (a free trial edition).
The result of this is that you’ll have both Windows and SQL Server running on your Mac. And because you’re using VirtualBox, switching between macOS and Windows is as easy as switching between any other application.
As mentioned, this method involves Windows. If that scares you, then you might be better off installing SQL Server on your Mac via a Docker container. That method doesn’t involve Windows in any shape or form.
But if you don’t mind using Windows (or if you need to), here are the main steps for installing SQL Server for Windows on your Mac using VirtualBox:
- Download and Install VirtualBox
- Create a New Virtual Machine (VM)
- Download the Windows ISO image
- Install Windows
- Download and Install SQL Server
Below are more detailed instructions for each of these steps.
Download and Install VirtualBox
- The first step is to download VirtualBox from the VirtualBox download page.
- Install VirtualBox just as you’d install any other software. Once the .dmg file has downloaded, open it up and double click on the VirtualBox.pkg icon. This opens the installer. Follow the prompts and close the installer once it’s installed.
VirtualBox is virtualization software by Oracle. It allows you to create virtual machines on your computer. This allows you to install other operating systems onto your Mac (or other computer). The benefit of this is that, once you’ve installed another operating system on your Mac, you can run any software that runs on that operating system.
Create a New Virtual Machine (VM)
This is where you create a new virtual machine that you will install Windows on.
- Open VirtualBox (via the Applications folder)
- Click New
- Follow the prompts to the end. Call the virtual machine Windows or Windows 10 or something descriptive. The default settings on each screen should be fine, although it might pay to bump up the memory to around 4GB (or more if you can afford it) when you get to the Memory Size screen. Just be sure to leave enough memory for your host machine.
Once you’ve finished, your new virtual machine will appear in the VirtualBox side panel.
Download the Windows ISO image
Now that we’ve created a virtual machine, we can go ahead and install Windows on that. But first we need to download it.
If you already have access to a fully licensed edition of Windows by all means use that.
If you intend to keep using Windows (i.e. pay for it), download an ISO file from the Microsoft download page.
Otherwise, you can install a free Windows evaluation trial from the Microsoft Evaluation Center. This allows you to install Windows for free, and trial it for 90 days. If you prefer this option, go to the Evaluation Center and select an edition of Windows to download. Note that the Evaluation Center usually only has the Enterprise Edition and Windows Server.
Once downloaded, move the file to the VirtualBox VMs folder. For example /Users/Bob/VirtualBox VMs/. Or even better, just download the file directly to that folder). This isn’t essential though – if you have another place for the file, go ahead and use that instead.
Install Windows
- Double click on your virtual machine in the VirtualBox side panel (like the one with the arrow pointing to it in the above screenshot).
- Use the interface to browse to the Windows ISO file that you downloaded, and click Start.
- Follow the prompts to install Windows.
Once Windows is installed, the Windows desktop will be displayed.
Download and Install SQL Server
These steps are done using Windows inside the virtual machine you just created (not with your macOS).
- Using the Windows VM that you just installed, open up Edge (Microsoft’s web browser) and download the SQL Server installation file from Microsoft’s SQL Server download page (seeing as you’ll be doing this from within the VM, it’s probably easiest to do a web search for “download sql server” or similar, and choosing the official Microsoft website from the results). The Developer edition is fine, but use whichever edition suits you best.
- Run the installer file and follow the prompts. This downloads and installs SQL Server.
Once SQL Server has been installed, a screen will appear with Installation has completed successfully! Keep this screen open for now – this screen has a button to install SQL Server Management Studio (SSMS). See below for how to install SSMS.
Download and Install SQL Server Management Studio (SSMS)
SQL Server Management Studio is a GUI tool from Microsoft that helps you manage SQL Server. SSMS is one of many tools that you can use with SQL Server, so this step is optional. However, if you’re learning how to use SQL Server, you should definitely learn how to use SSMS.
- While still on the previous screen (i.e. the one that reads Installation has completed successfully!), click Install SSMS to download SQL Server Management Studio. This opens the SSMS download page in a web browser. Find the download link (it will read Download SQL Server Management Studio 17.6 or similar, depending on the version at the time of download) and click it to download SSMS.
- Once downloaded, run the installation file and follow the prompts.
Once SSMS has been installed, you can open it via the Windows Start menu.
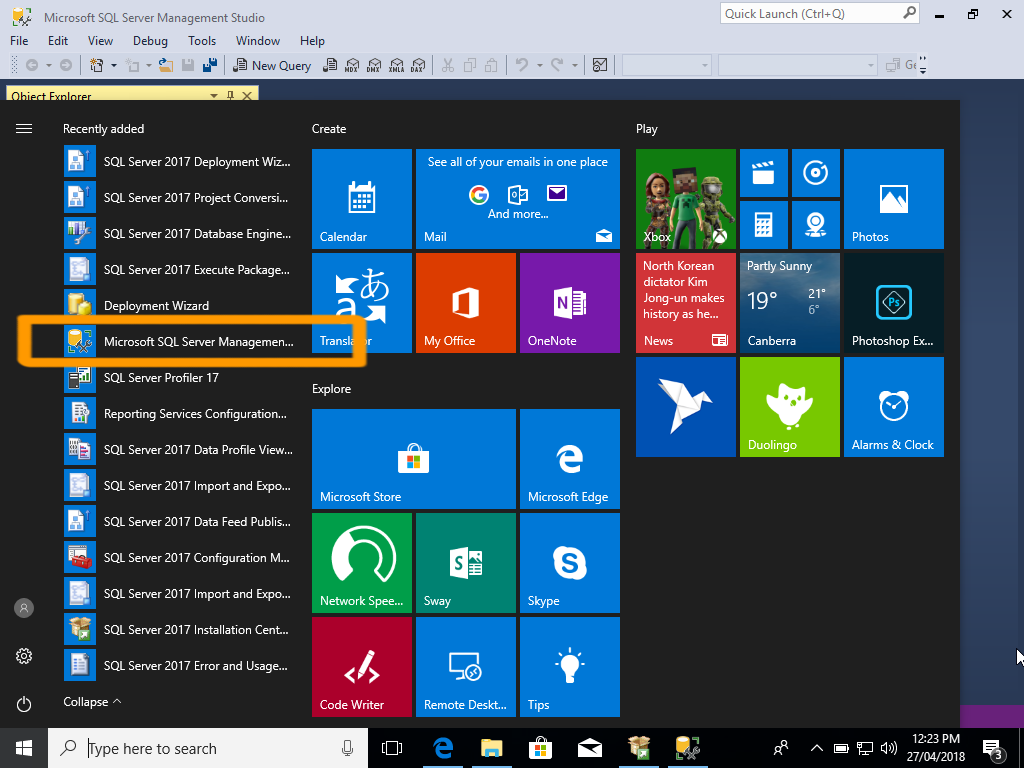
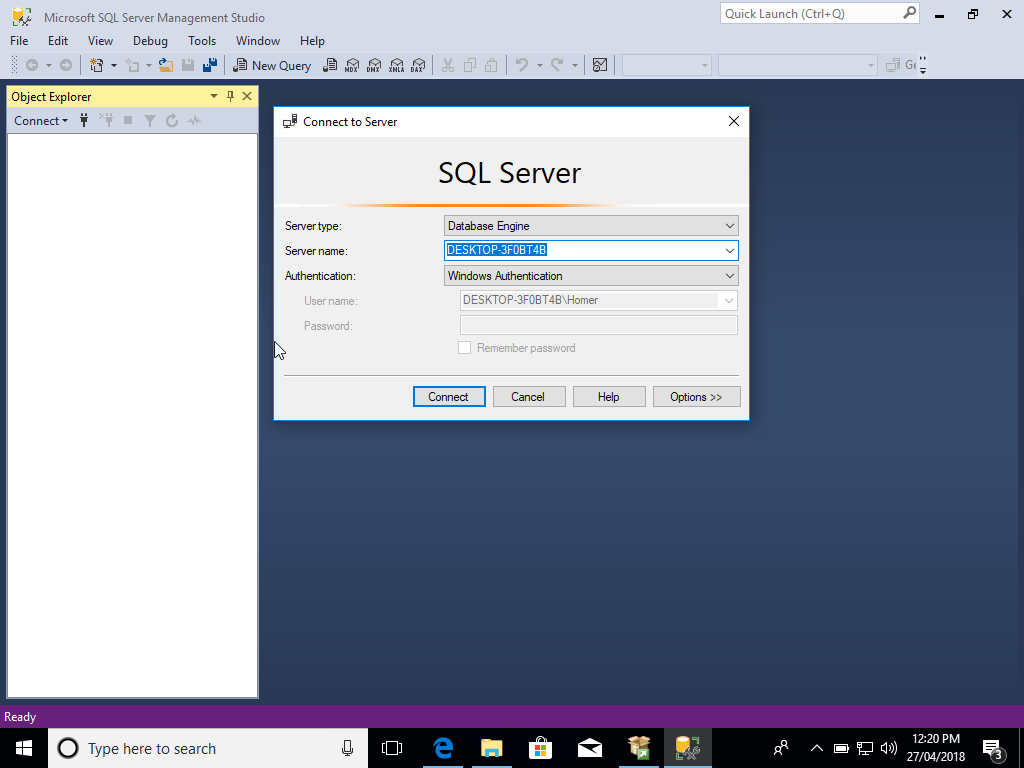
When you open SQL Server Management Studio, a connection will need to be established to SQL Server. A connection box will pop up, allowing you to enter your details or confirm the ones that have been pre-populated. Go ahead and click Connect to start using SQL Server.
Optional Extra: Install the VirtualBox Guest Additions
Guest Additions is a free optional extra that can make your life easier when working with your virtual machine. Guest Additions provides closer integration between the virtual machine and the host machine. Guest Additions provides features such as shared folders, time synchronization, mouse pointer integration, and more.
The VirtualBox Guest Additions are installed inside the virtual machine after you’ve installed Windows (or other operating system).
For more information about the Guest Additions, as well as installation instructions, see this Guest Additions help article on the VirtualBox website.