Here, I explain how to use Azure Data Studio (formerly SQL Operations Studio) to create a database in SQL Server.
In my case, I’m running SQL Server on a Mac (via a Docker container), but these instructions are generic and should work exactly the same way on Linux and Windows.
This tutorial assumes you already have Azure Data Studio installed on your machine, and you’ve connected to your SQL Server instance. If you don’t have Azure Data Studio installed on your machine, here are instructions for installing it on a Mac and connecting to SQL Server via Docker. The Azure Data Studio installation is pretty straightforward (you install it just like any other software), so if you’re on Linux or Windows, you shouldn’t have any issues.
To create a database in Azure Data Studio, you simply open a new query editor and run a CREATE DATABASE query.
Open a New Query Editor
In Azure Data Studio, there are several ways to open a new query editor. They are:
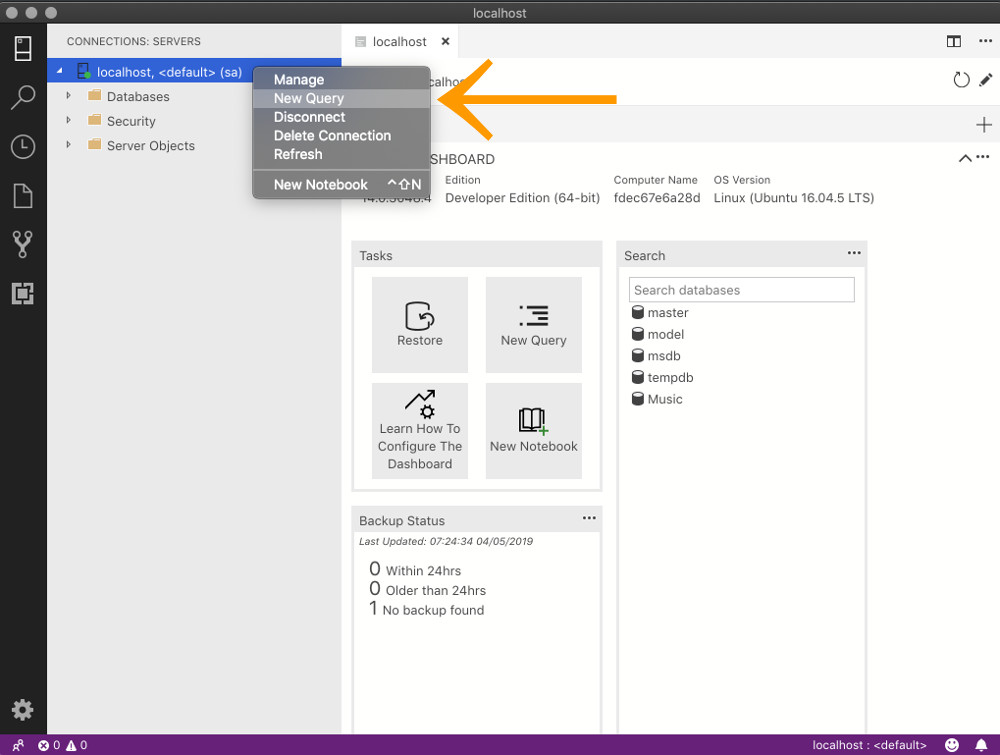
- Right-click on the server name in the left pane, then click on the New Query option from the contextual menu (pictured below).
- Click on the New Query button on the Server Dashboard
- Use a keyboard shortcut (on Windows this is Ctrl+N. On Mac it’s Cmd+N)
Here’s a screenshot of the first option:
Create the Database
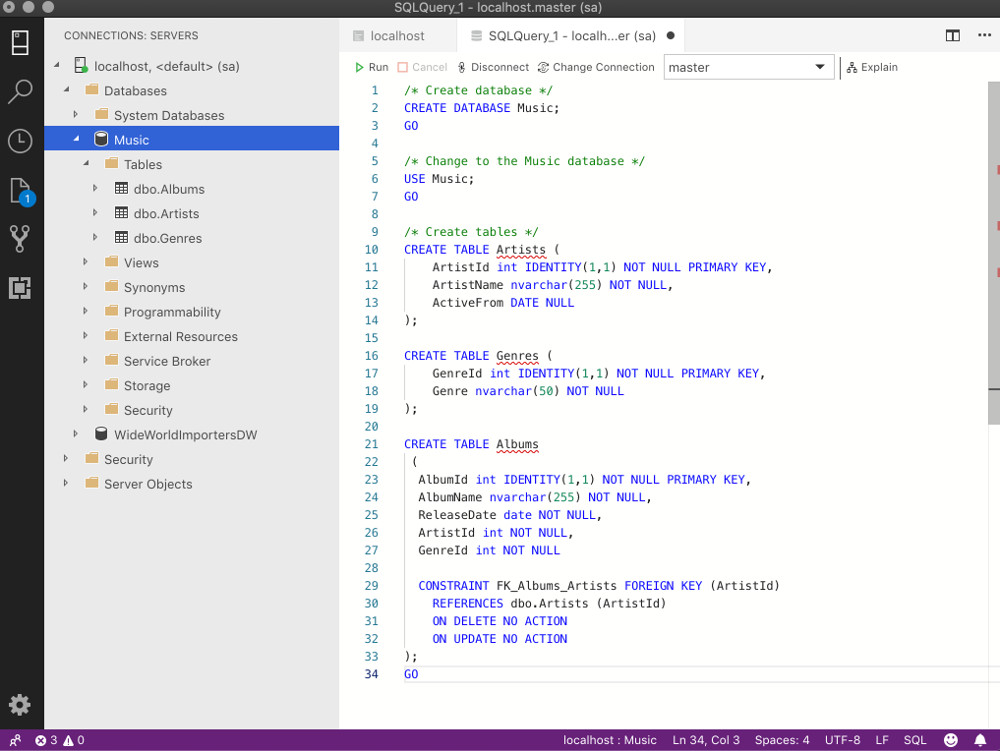
So, now that you’ve opened a new query editor, you can go ahead and enter your CREATE DATABASE statement.
- Enter your query. You can either type it all out, or copy and paste it. Another option is to open a previously saved query by going to the File > Open menu option. Here’s the script that I used for this example:
/* Create database */ CREATE DATABASE Music; GO /* Change to the Music database */ USE Music; GO /* Create tables */ CREATE TABLE Artists ( ArtistId int IDENTITY(1,1) NOT NULL PRIMARY KEY, ArtistName nvarchar(255) NOT NULL, ActiveFrom DATE NULL ); CREATE TABLE Genres ( GenreId int IDENTITY(1,1) NOT NULL PRIMARY KEY, Genre nvarchar(50) NOT NULL ); CREATE TABLE Albums ( AlbumId int IDENTITY(1,1) NOT NULL PRIMARY KEY, AlbumName nvarchar(255) NOT NULL, ReleaseDate date NOT NULL, ArtistId int NOT NULL, GenreId int NOT NULL CONSTRAINT FK_Albums_Artists FOREIGN KEY (ArtistId) REFERENCES dbo.Artists (ArtistId) ON DELETE NO ACTION ON UPDATE NO ACTION ); GO - Click the Run button at the top of the query editor.
View the Database
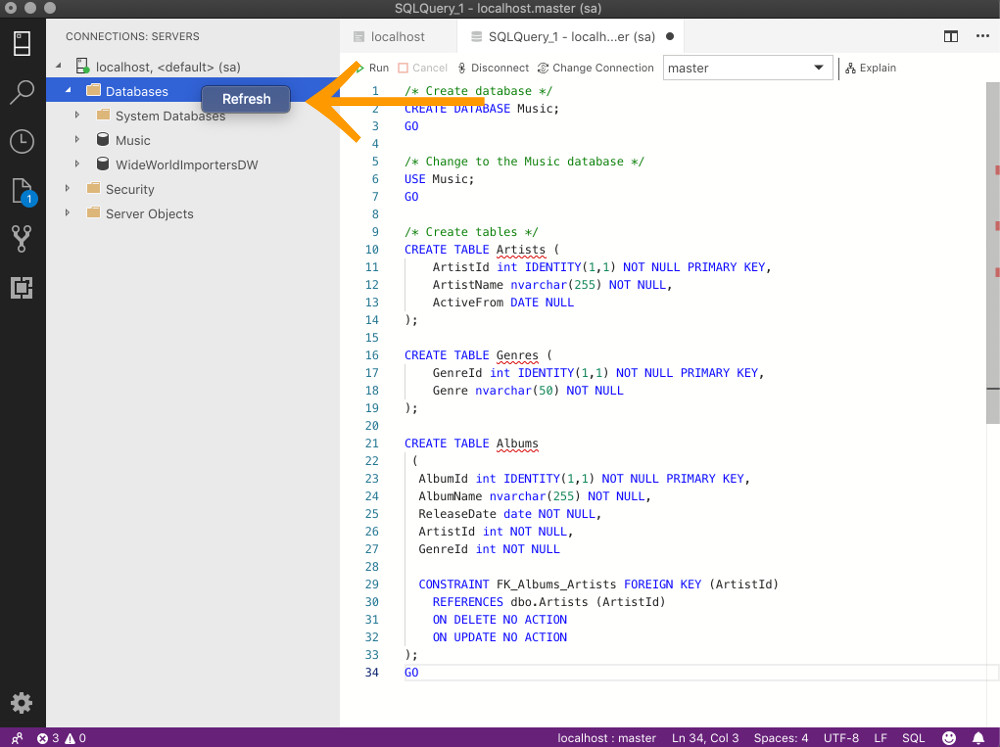
Now that you’ve run your query, you should be able to see the database in the left pane. If you don’t see it, you probably need to refresh it.
- Right-click on Databases in the left pane
- Click Refresh from the contextual menu
You should now see your database appear under Databases (when it’s expanded):