This article explains how to create a Database Mail profile in SQL Server using the SQL Server Management Studio (SSMS) graphical user interface.
If you want to see how to do it using T-SQL, see How to Create a Database Mail Profile in SQL Server (T-SQL).
This article assumes that you’ve previously enabled and configured Database Mail, and you’re now going in to add a profile to that previously configured DB Mail configuration.
If this is the first time Database Mail is being configured on your SQL Server instance, then use How to Setup Database Mail (SSMS) instead. That article goes through the actual steps of enabling Database Mail, adding a profile, account, etc. The process is similar, but there are a couple of extra steps involved when you first configure Database Mail.
With that said, let’s create a profile.
Create a Profile and Add an SMTP Account
When you create a Database Mail profile, you also need to add one or more Database Mail accounts to that profile.
Actually, you have a choice of whether or not to do the whole configuration (i.e. add SMTP accounts, specify profile security, and configure system parameters, etc), or just create the profile and add an account.
I’ve covered the whole configuration option in How to Setup Database Mail (SSMS).
In this example, we’re going to create the profile and add an existing account.
From the Object Explorer, open the Management node and right click Database Mail:
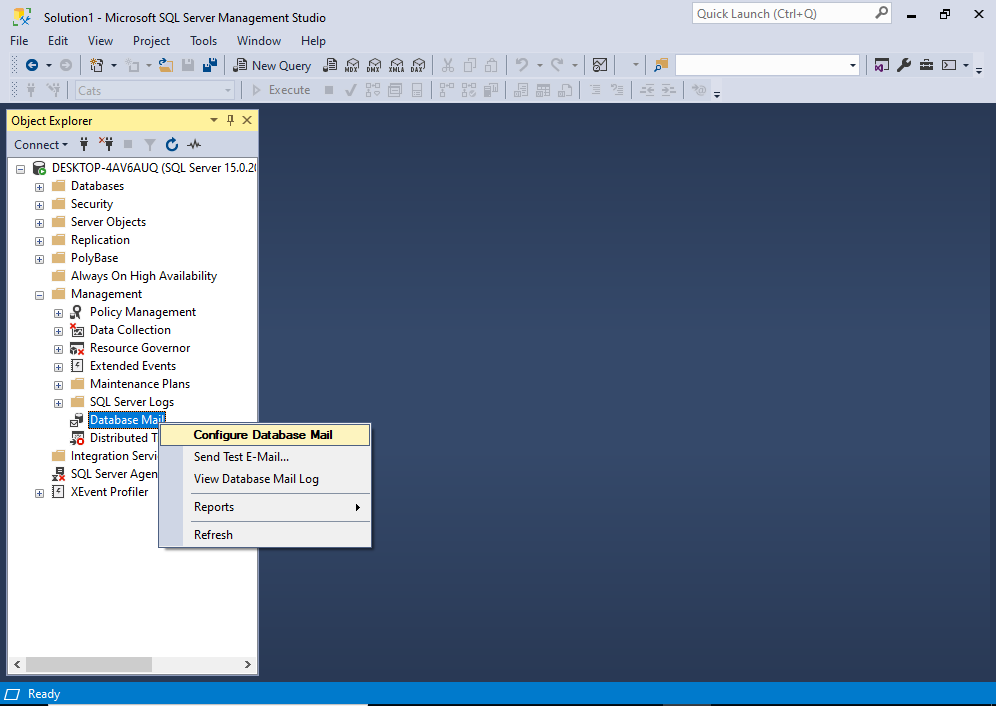
From the context menu, click Configure Database Mail.
You may get an interim “Welcome” screen before you get to the next one. If so, click Next > to continue to the following screen.
This opens the following screen:
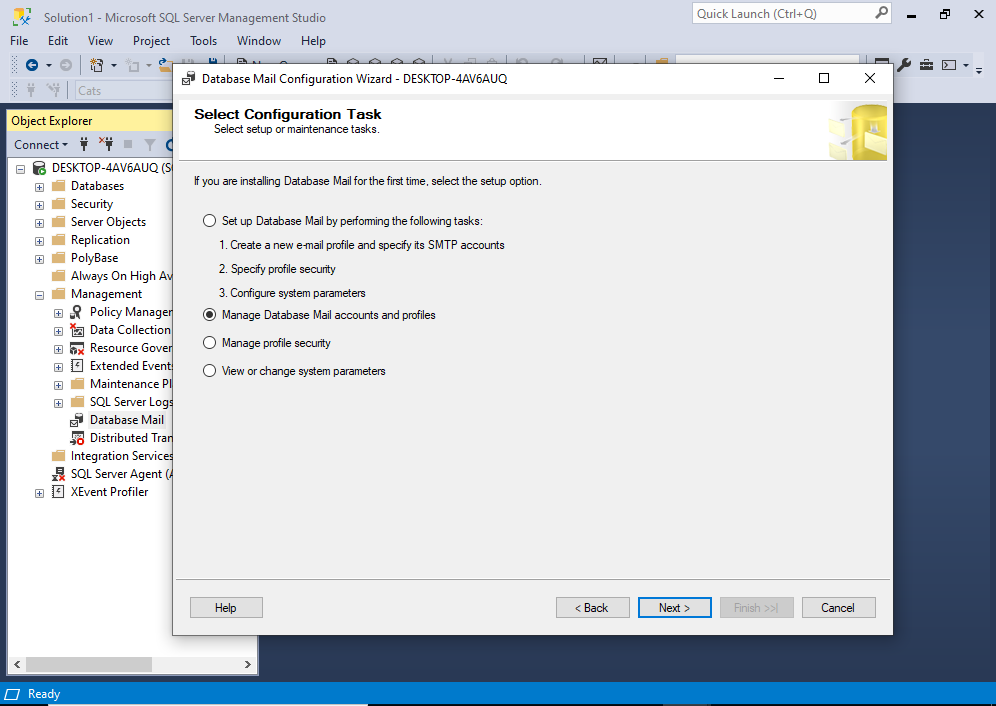
On this screen, select Manage Database Mail accounts and profiles, then click Next >.
This brings us to the Manage Profiles and Accounts screen:

Select Create a new profile and click Next >.
This opens the New Profile screen:
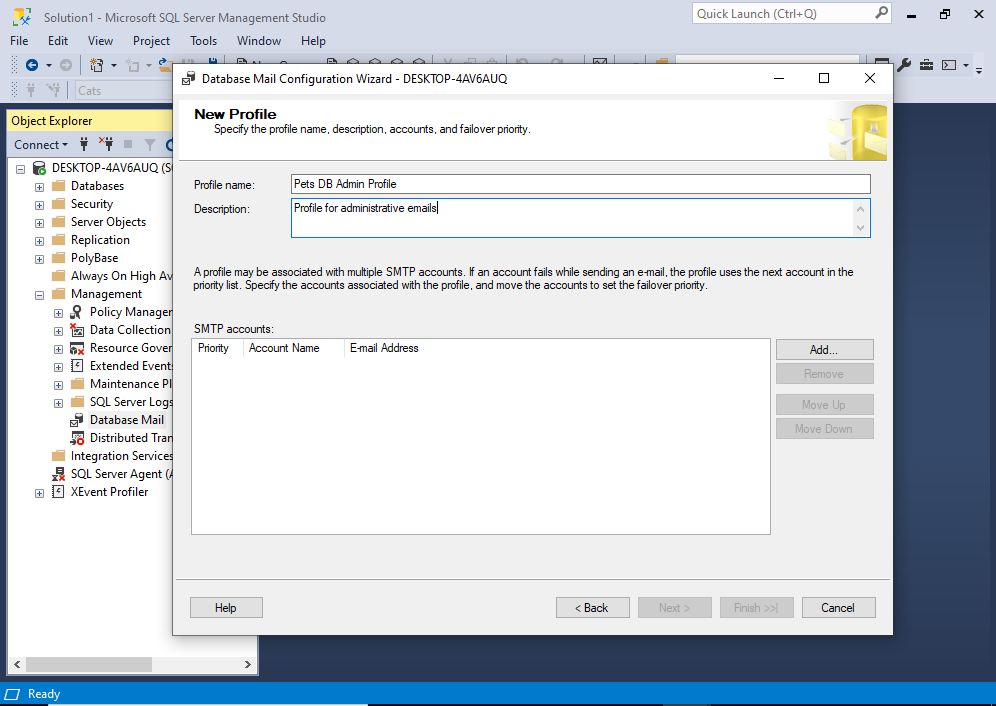
Enter a name and description for the profile, and then click Add… to add at least one SMTP account to the profile.
This launches a little dialog box where you have the choice of either adding an existing account, or creating a new one:
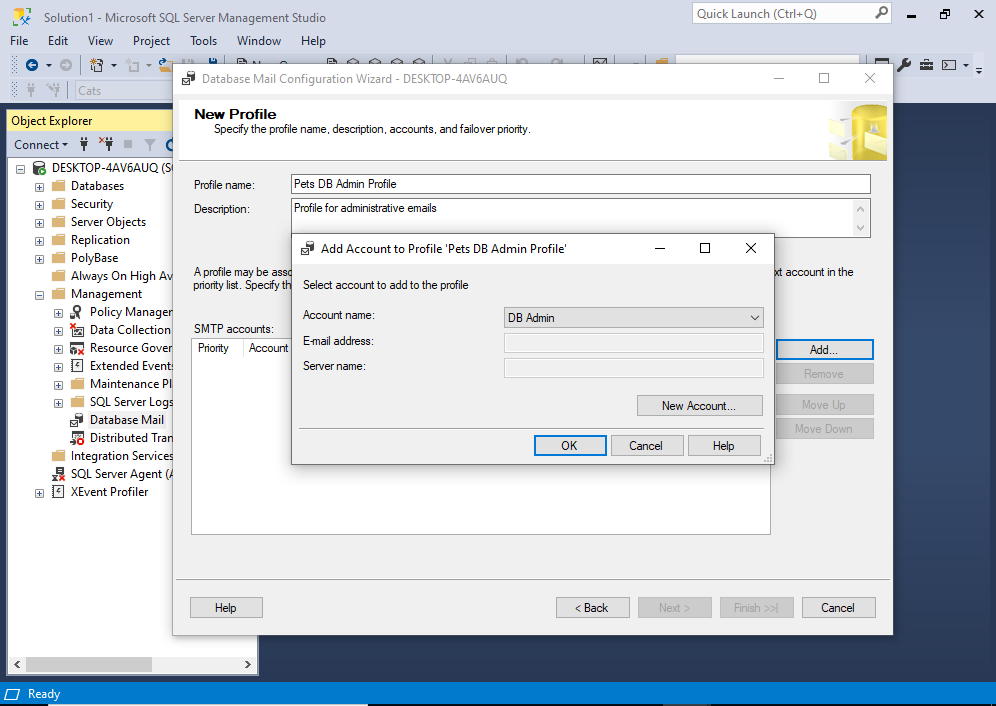
In my case, there’s already an existing account called DB Admin, and I’m going to select that one.
If you also have an existing account you’d like to use, click OK.
If you need to create a new account, click New Account… and complete the details as required.
Once the new or existing account has been confirmed, we get back to the New Profile screen:
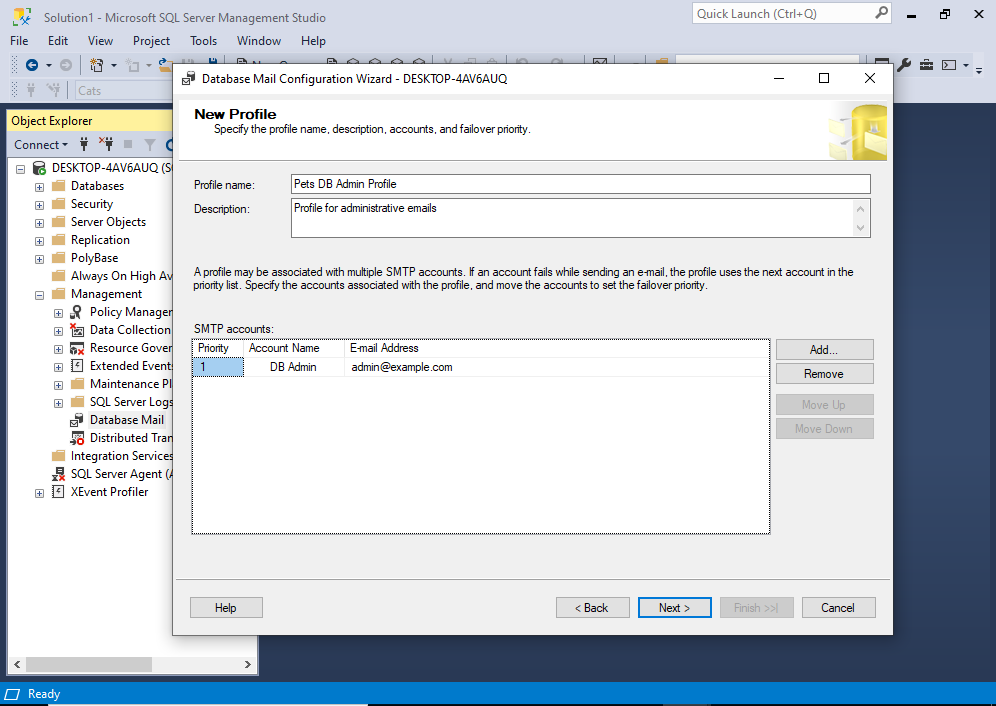
We can now see the account that we just added in the list of SMTP accounts. You can add more accounts if required.
Having multiple SMTP accounts in a profile is a good idea. If one account fails for whatever reason, Database Mail will try the next account, and if that fails, the next one, and so on.
But for the purpose of this tutorial, we’ll leave it at one account, and click Next >.
This moves us along to the Compete the Wizard screen:
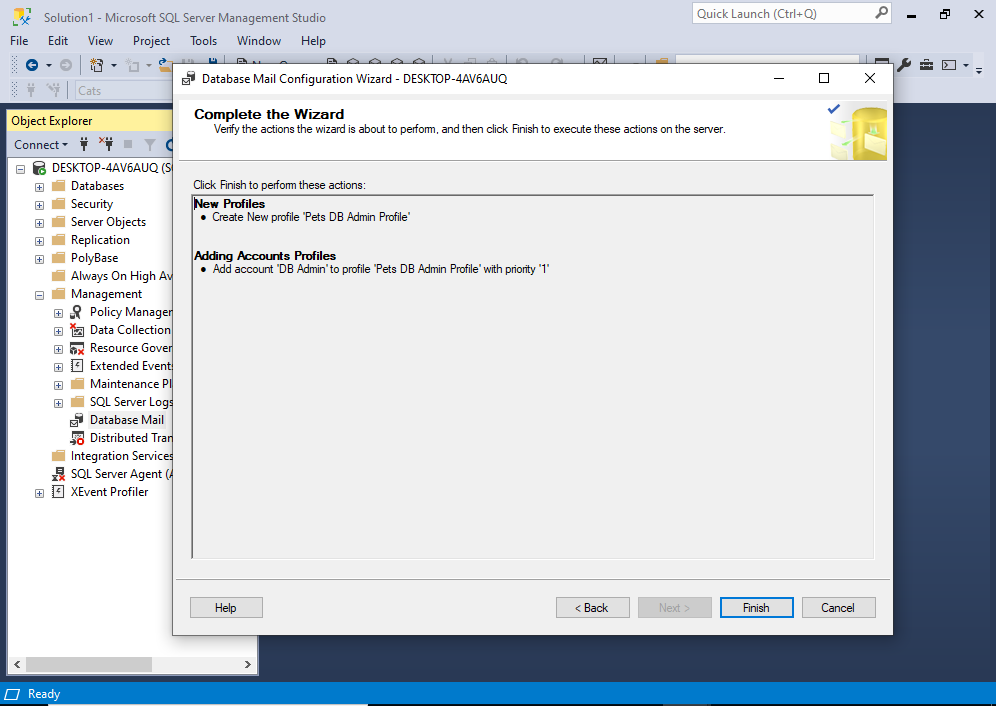
This provides you with one last opportunity to review the changes you’re about to implement, and go back and make adjustments if necessary.
If all looks good, click Finish.
The configuration is now effected, and you’ll see its progress on the screen:
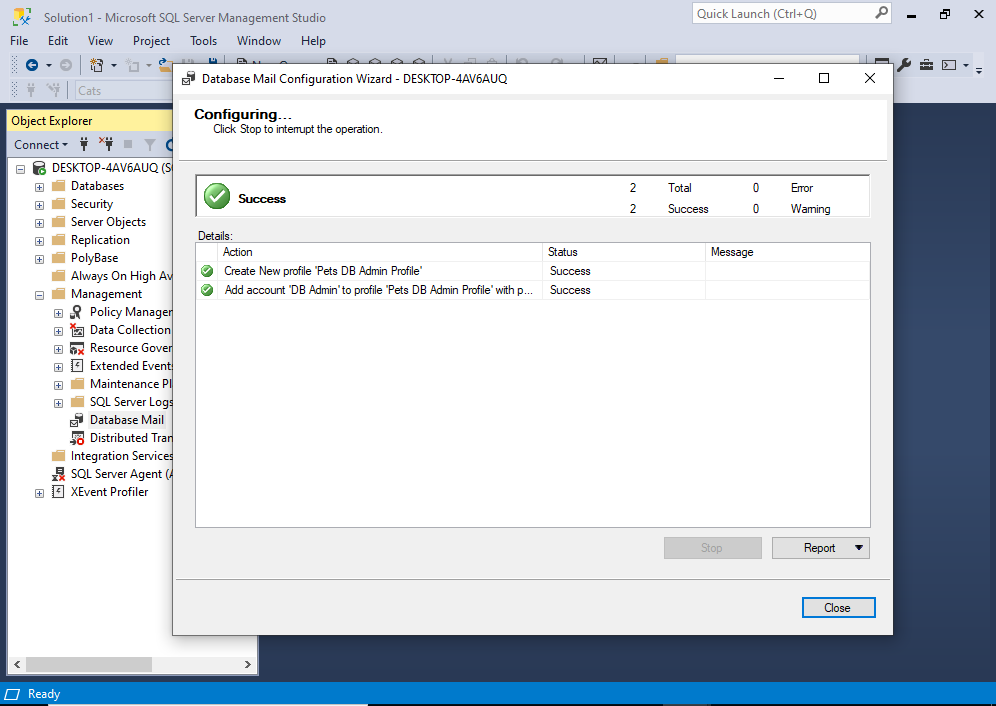
If it all goes well, you’ll see that everything is labelled a “Success”.
Congratulations, you’re all done!
Click Close to finish.