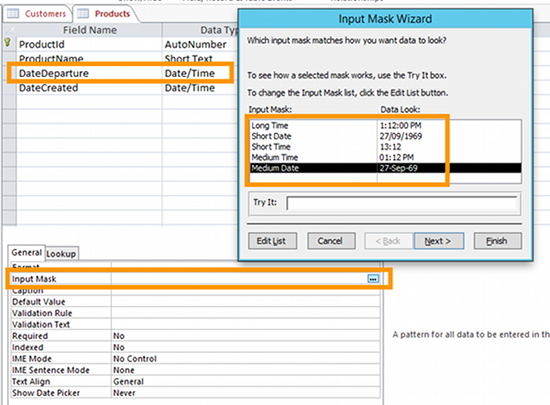
The Input Mask Wizard is a feature of Microsoft Access that helps you create an input mask.
An input mask allows you to specify exactly how data should be entered into the database. It’s an expression that specifies certain rules about how the data should be formatted as it is entered into the system.
Here’s an example of an input mask:
(999) 000-0000
This specifies the format that a phone number must be entered. The number 9 indicates an optional character. The number 0 specifies a mandatory one. So in this example, the area code is optional.
What does the Input Mask Wizard Look Like?
Here’s what the Input Mask Wizard looks like (it’s the popup box titled Input Mask Wizard):

In the above example, the Input Mask Wizard has been launched while working on a table in Design view.
In this case the Input Mask Wizard is being used to apply an input mask to the “DateDeparture” field. The input mask will restrict any dates being entered to only that format.
When using the wizard, you can see how the input mask will look by using the “Try It” box. Once you’re happy with how it looks, you can then follow the prompts to create the mask.
Where Can I Launch the Input Mask Wizard?
Input masks can be applied to table fields, queries, and to form and report controls. The Input Mask Wizard can be launched by clicking on the little dotted icon that looks like this: ![]()
Note that you don’t actually need to use the wizard to apply an input mask. If you know how to write the input mask you can write it directly into the Input Mask cell. All the Input Mask Wizard does is generates the correct mask and inserts it into that same cell.
Also note that if you use the Date Picker on a field, you can’t apply an input mask to that field.