Restoring a database is a piece of cake with Azure Data Studio. It’s a similar process to doing it with SQL Server Management Studio. Simply click Restore and follow the prompts.
This restore process allows you to navigate through the computer’s file system to locate the .bak file. This .bak file contains a backup of the database you want to restore. So when SQL Server restores the database, it’s using the .bak file to do so.
However, if you’re running your SQL Server instance inside a Docker container (which of course, you would be if you’re running SQL Server on Mac or Linux), there’s something you need to be aware of if your backup file is located outside the Docker container.
If the backup file is located outside the Docker container that’s running SQL Server, you’ll need to copy it into the Docker container before you do the restore. Once you’ve copied the .bak file into the Docker container, you can go ahead and use Azure Data Studio to restore the database.
Below I outline all the steps involved.
This tutorial assumes that you’ve installed SQL Server on your Mac using a Docker container, and you’ve installed Azure Data Studio.
I should point out that, even though the examples on this page were done on a Mac, all steps should work on both macOS and Linux.
Download a Sample Database
If you already have your own database .bak file, you don’t need to do this step.
For this tutorial, I’m going to restore the WideWorldImporters sample database. This is a sample database that Microsoft has made available for showing off the various features of SQL Server. In particular, I’ll be using the data warehousing version of the database.
To download the WideWorldImporters sample database .bak file, either go to the WideWorldImporters Github page and find the download link, or you can download the .bak file directly here:
- WildWorldImportersDW-Full.bak [47.7mb]
Copy the .bak file to the Docker Container
You’ll only need to do this step if your .bak file is located outside the Docker container (which it will be if you just downloaded the WideWorldImporters .bak file).
First, let’s create a folder inside the Docker container:
sudo docker exec -it sql_server_demo mkdir /var/opt/mssql/backup
Now copy the database .bak file into that folder:
sudo docker cp WideWorldImportersDW-Full.bak sql_server_demo:/var/opt/mssql/backup
This command assumes you’re in the same directory as the .bak file. If not, either change into the directory first using. For example:
cd Downloads
or whatever folder it’s in.
Why do we need to Copy the .bak File?
The Docker container has its own file system, and it lives kind of independently of your Mac’s file system. So when you try to navigate to the .bak file in Azure Data Studio (in the next step), you’ll find yourself “stuck” inside the Docker container’s file system, with no way of accessing the .bak file on your Mac’s file system. Therefore, we copy the .bak file to the container’s file system first, then we can access it via Azure Data Studio.
Restore the Database
OK, now we can do the actual database restore process.
The following steps assume you’ve already got Azure Data Studio running, and you’ve already connected to SQL Server.
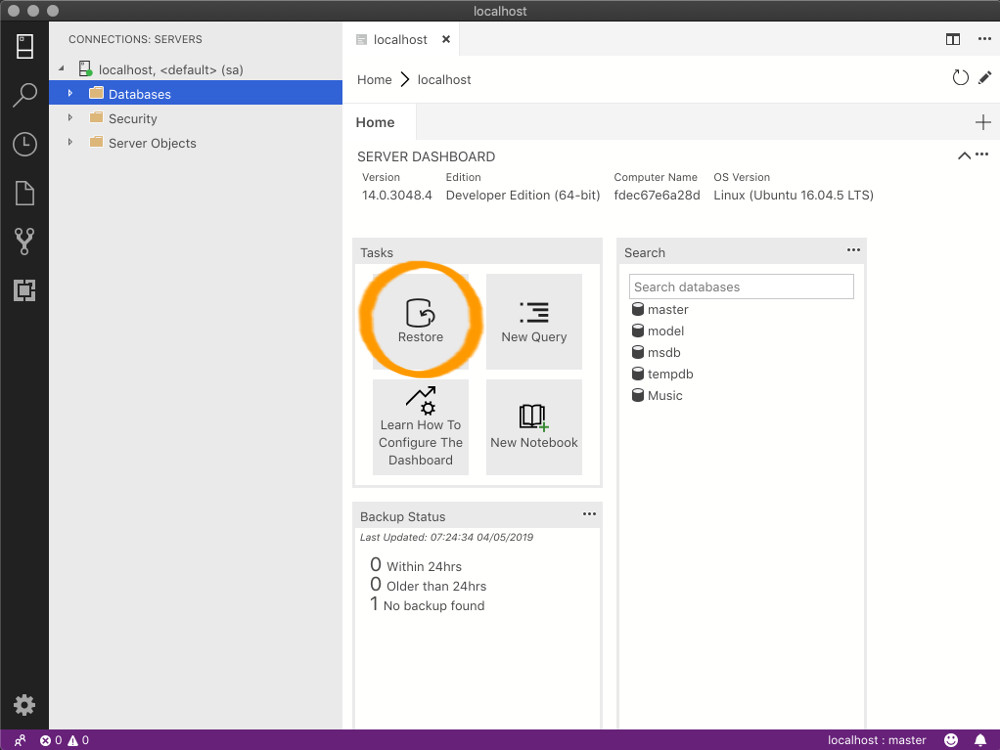
- From the Server Dashboard, click the Restore button
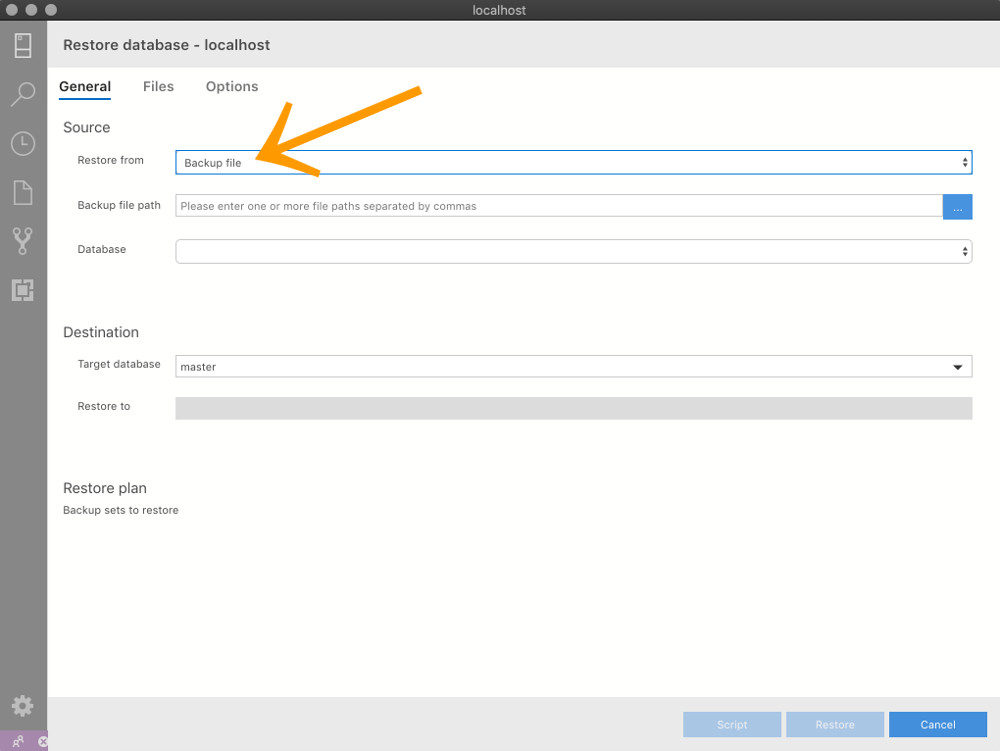
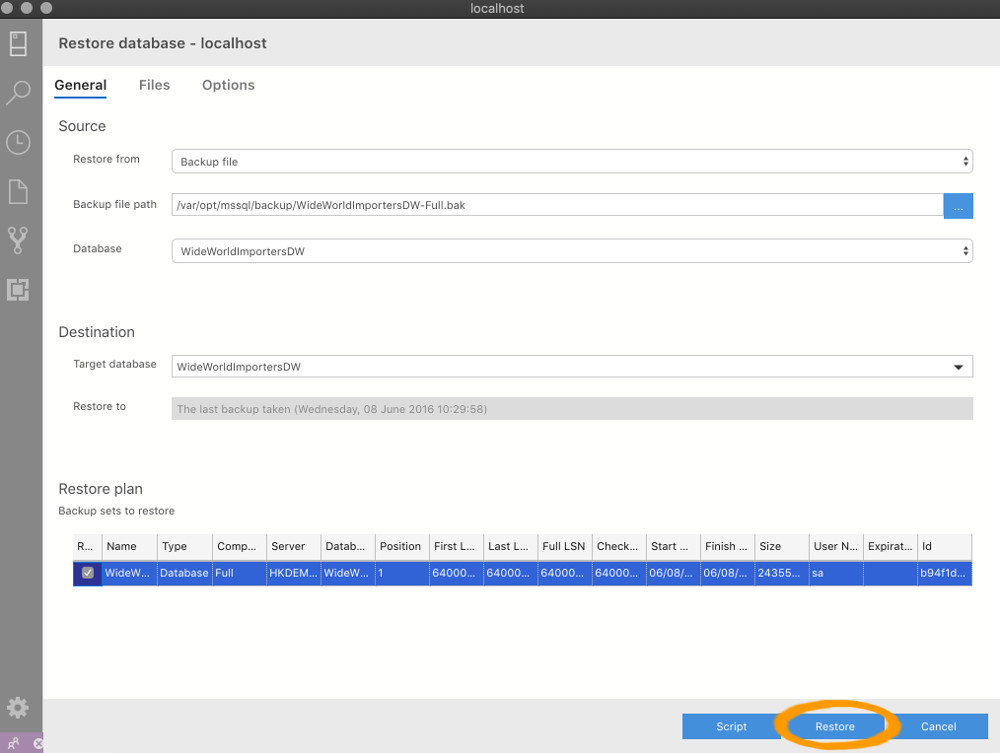
- At the Restore from heading, select Backup file from the dropdown menu
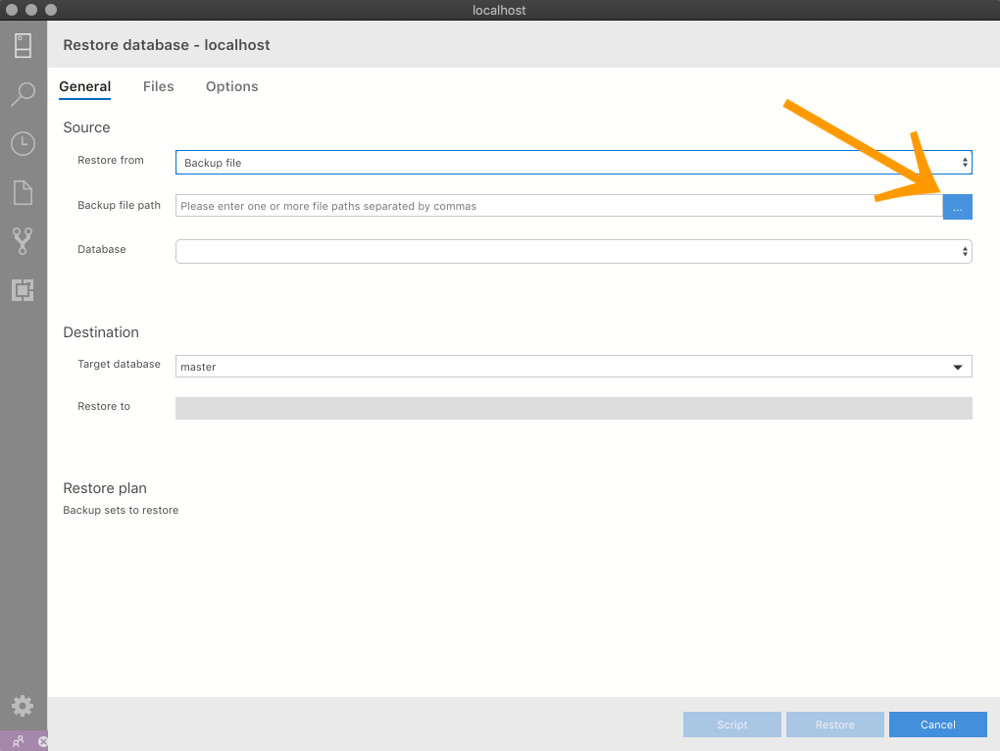
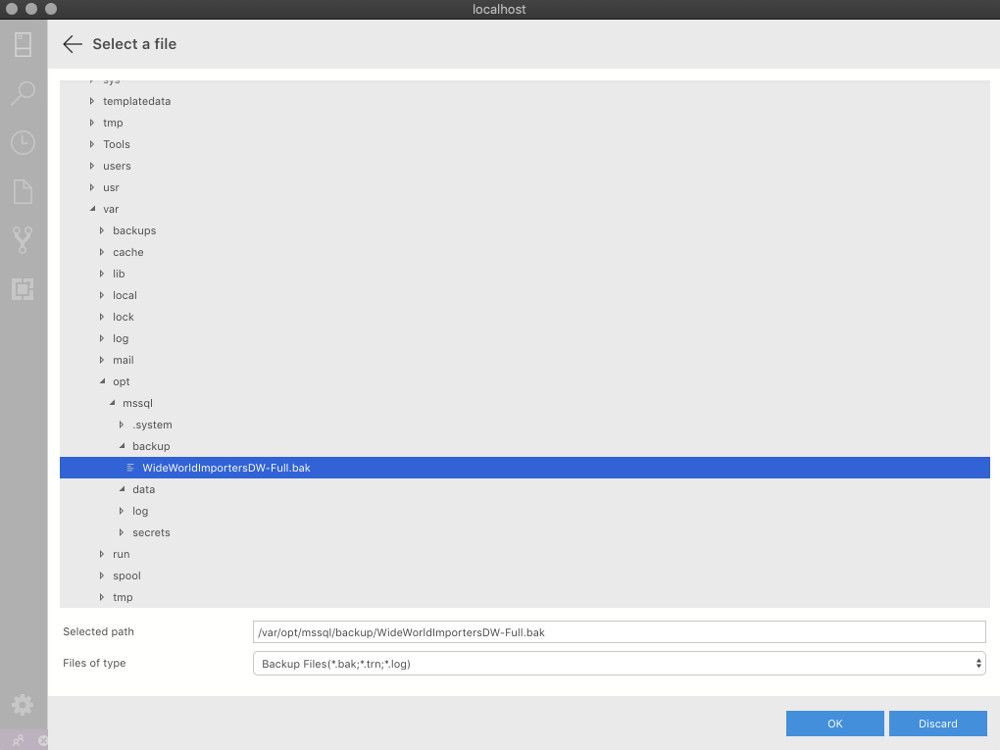
- At the Backup file path heading, click the ellipses (…)
- Navigate to the folder, select the .bak file and click OK
- Click Restore
- The restore might take a minute or two. The Task History will indicate when it’s ready
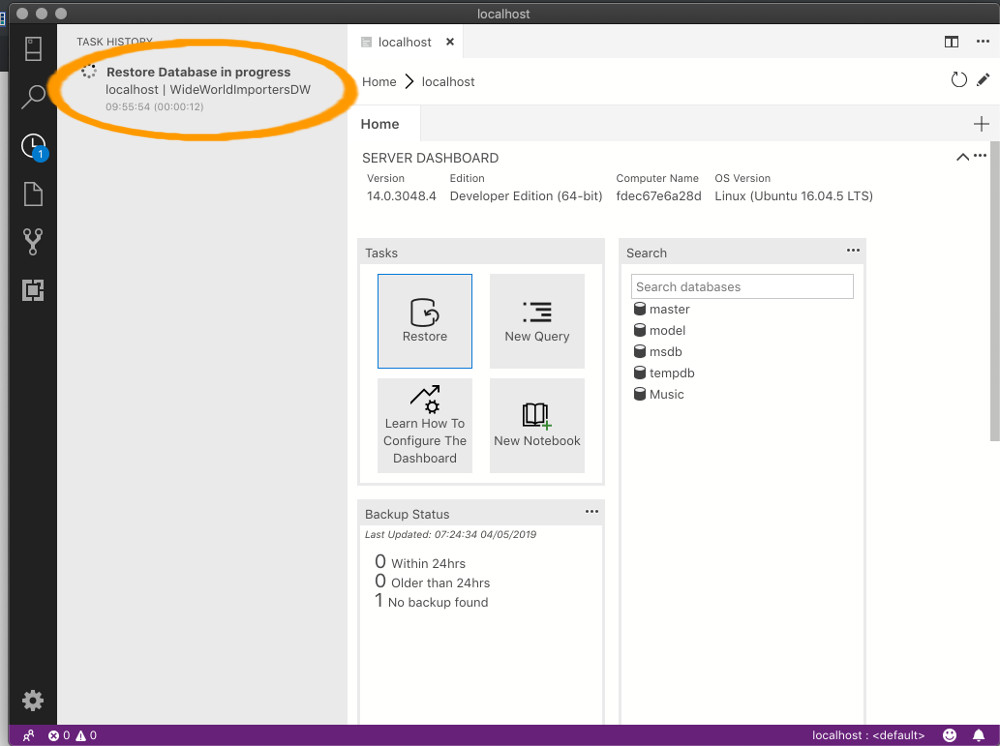
The database has now been restored.
Check the Database
You’ll probably want to check that the database has in fact been restored. One way of doing this is to navigate to the database and run a quick query.
- Click on the Servers icon (top left of the screen)
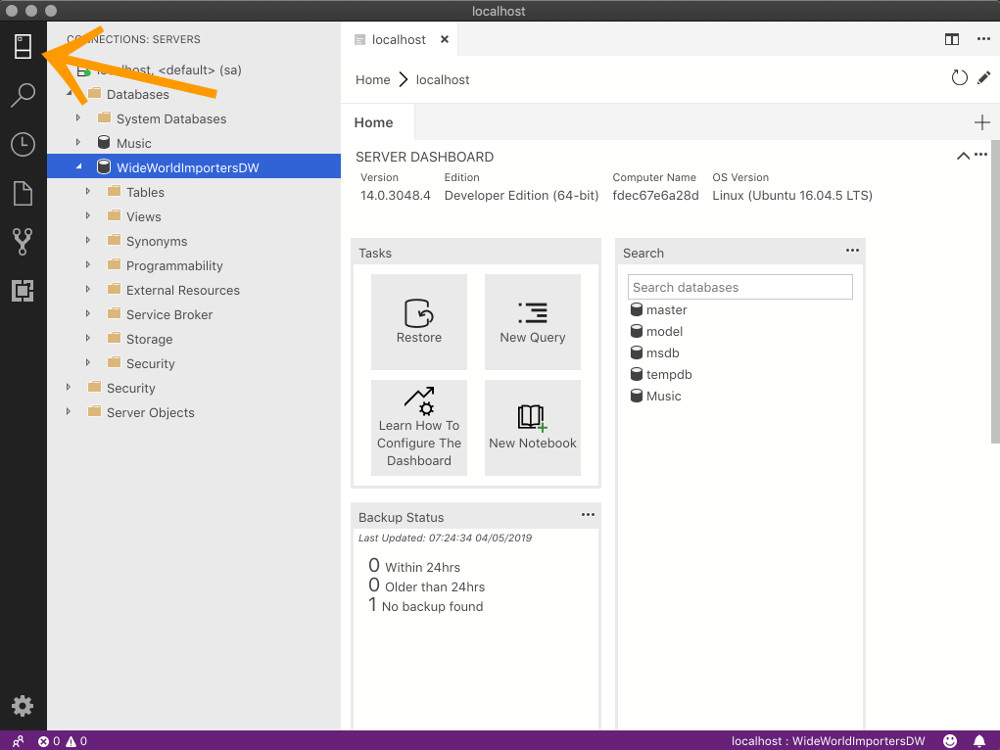
- The database should now be listed under the Databases heading for the applicable server. If not, right click Databases and select Refresh
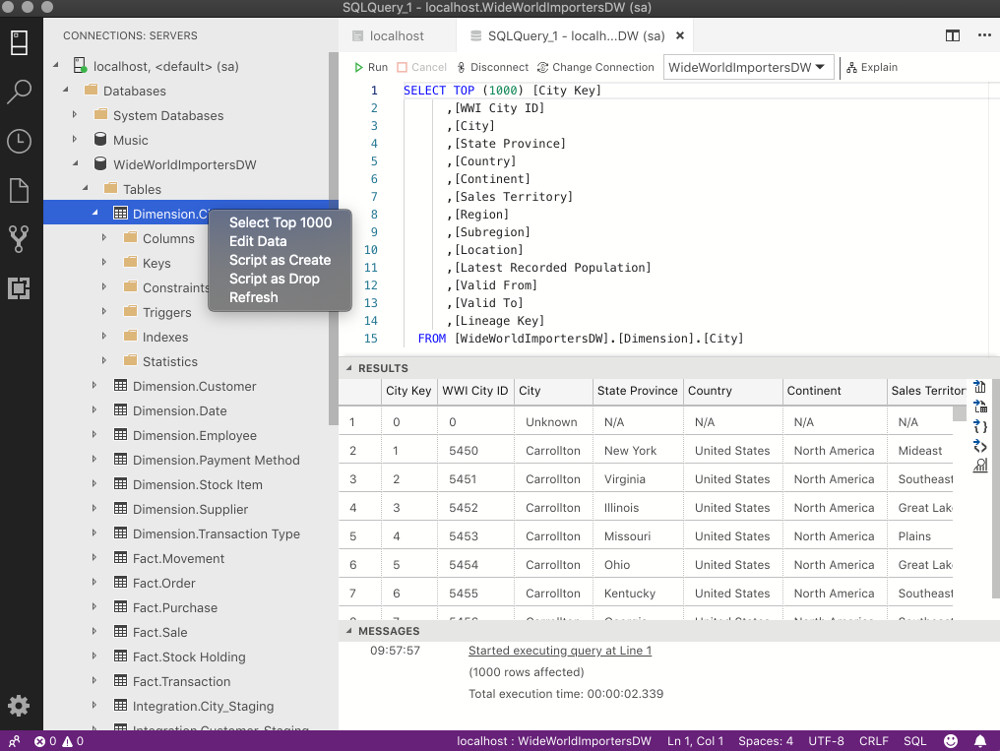
- Use the Azure Data Studio interface to run a query against the database. For example, right-click on the Tables node (after expanding the database) and click Select Top 1000. This automatically runs a query against that table, selecting only the top 1000 results