To create a relationship in Access 2013 or 2016:
- While viewing a table in Design view, and ensuring that the DESIGN tab is selected, click Relationships from the Ribbon
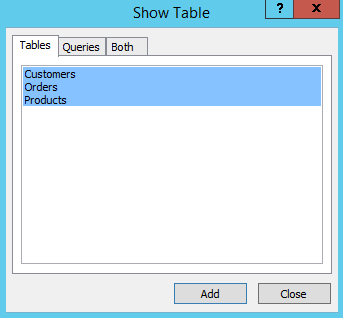
- A Show Table dialog will appear with a list of tables and queries. Select the tables (and/or queries) that you wish to create a relationship between, and close the dialog
- The Relationships tab will appear with the selected tables. Click and drag a field on top of a field in another table to initiate a relationship.
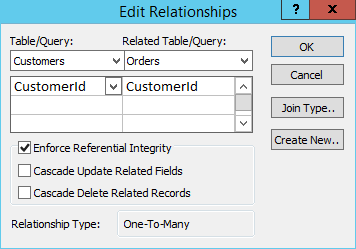
- The Edit Relationships dialog will pop up containing both fields. Make any adjustments and click OK
This will create the relationship. You will see the tables in the Relationship tab with lines depicting the relationship between the tables.
Here are screenshots for the above steps.
The “Relationships” Button
While viewing a table in Design view, and ensuring that the DESIGN tab is selected, click Relationships from the Ribbon.

The “Show Table” Dialog
A Show Table dialog will appear with a list of tables and queries. Select the tables (and/or queries) that you wish to create a relationship between, and close the dialog.

The “Relationships” Tab
The Relationships tab will appear with the selected tables. Click and drag a field on top of a field in another table to initiate a relationship.

The “Edit Relationships” Dialog
The Edit Relationships dialog will pop up containing both fields. Make any adjustments and click OK

The Result
