Here, I demonstrate how to delete a Database Mail profile in SQL Server using the SQL Server Management Studio (SSMS) graphical user interface.
If you want to see how to do it using T-SQL, see Delete a Database Mail Profile (T-SQL).
Let’s Begin
From the Object Explorer, open the Management node and right click Database Mail:
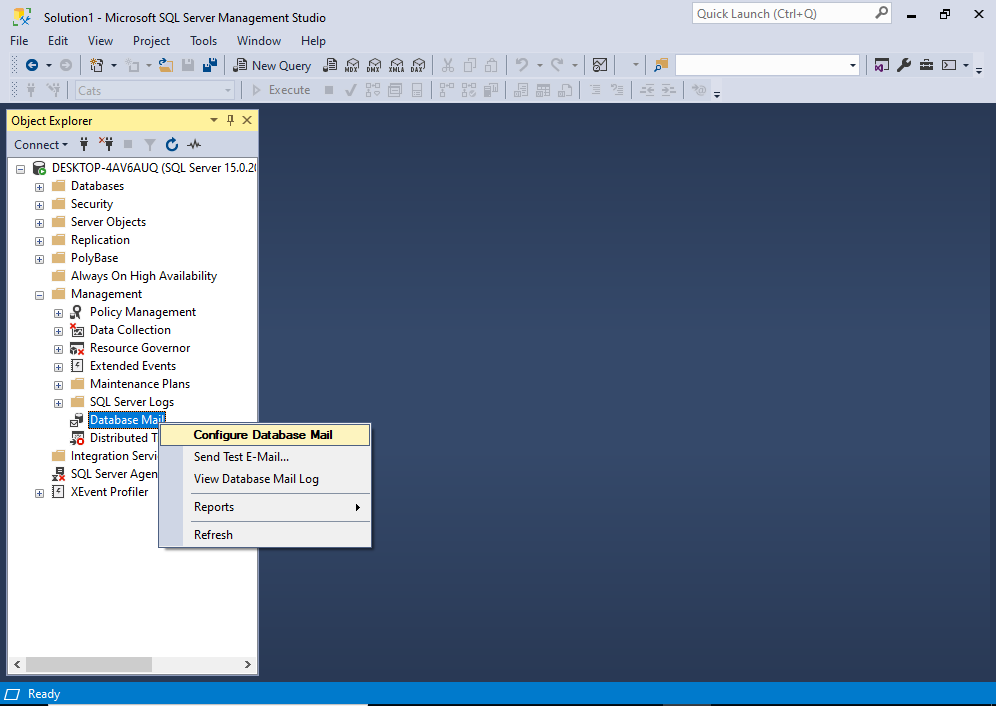
From the context menu, click Configure Database Mail.
You may get an interim “Welcome” screen before you get to the next one. If so, click Next > to continue to the following screen.
This opens the Select Configuration Task screen:
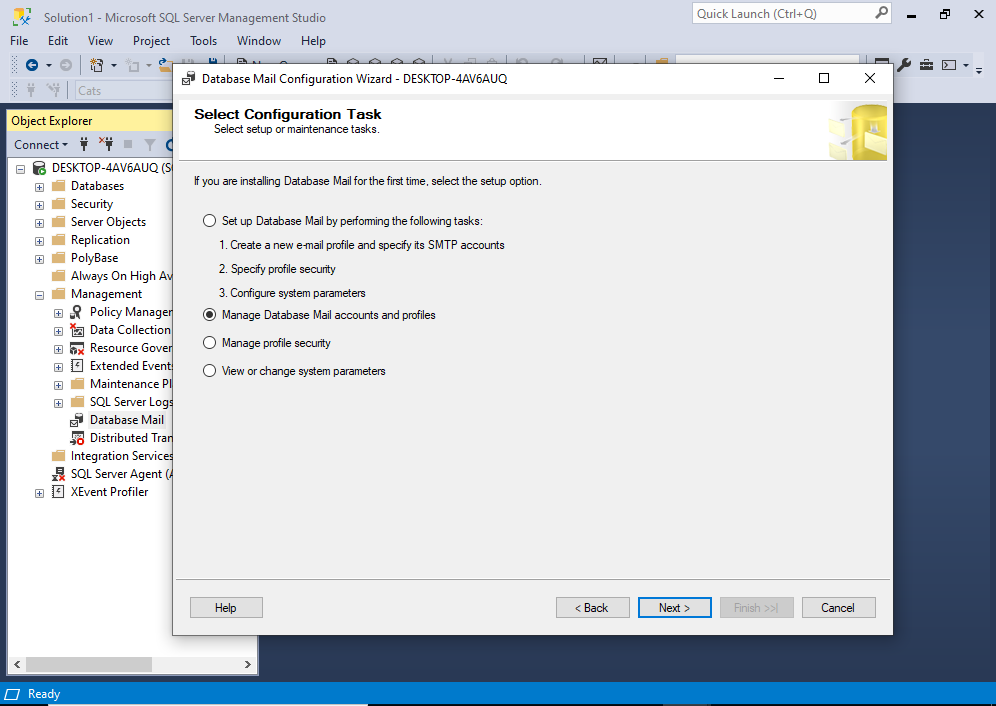
On this screen, select Manage Database Mail accounts and profiles, then click Next >.
This brings us to the Manage Profiles and Accounts screen:
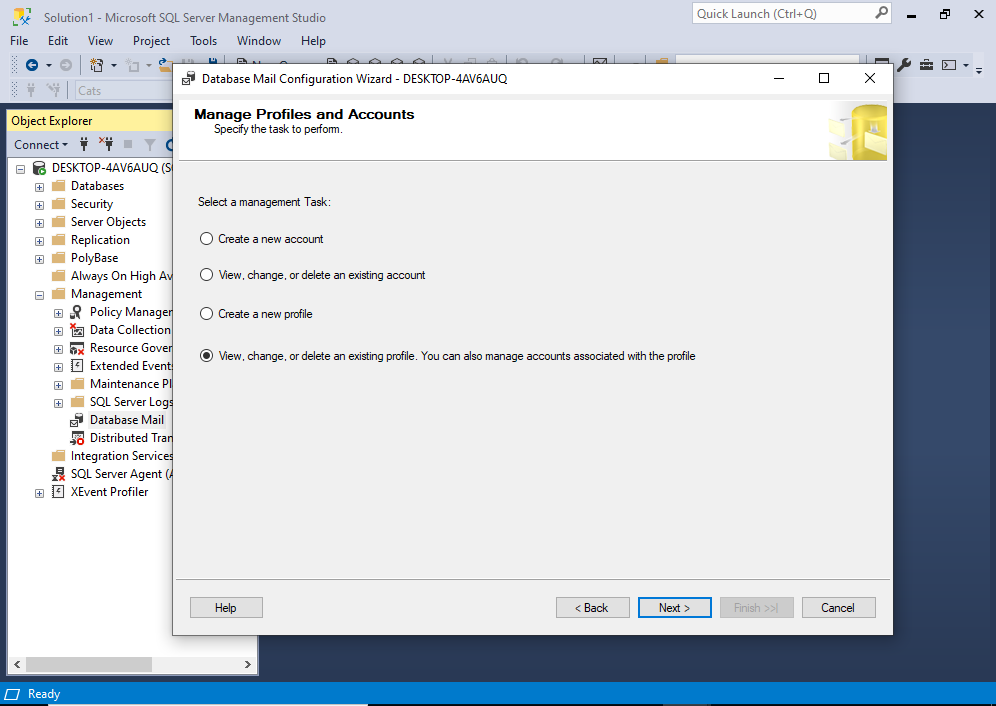
Select the last option View, change, or delete an existing profile… and then click Next >.
This moves us to the following screen:
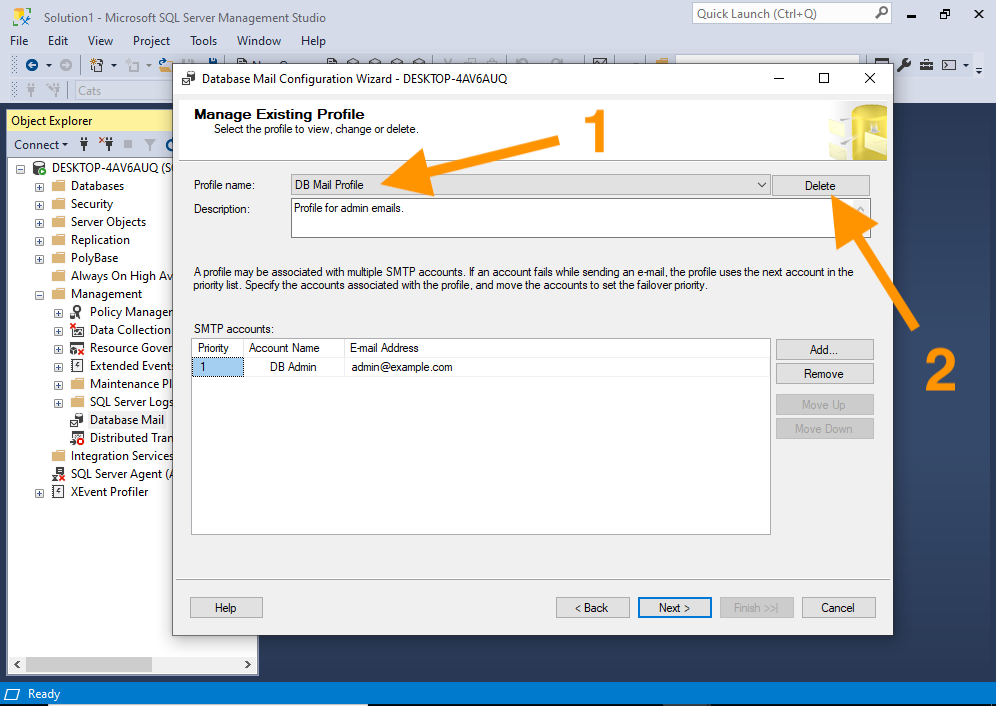
Be sure to select the right profile to delete. You do this by selecting the profile from the drop down menu at the top (step 1).
Once you’ve selected the correct profile, click Delete (step 2).
This takes results in a pop up dialog box, warning you about what will happen with any unsent mail:
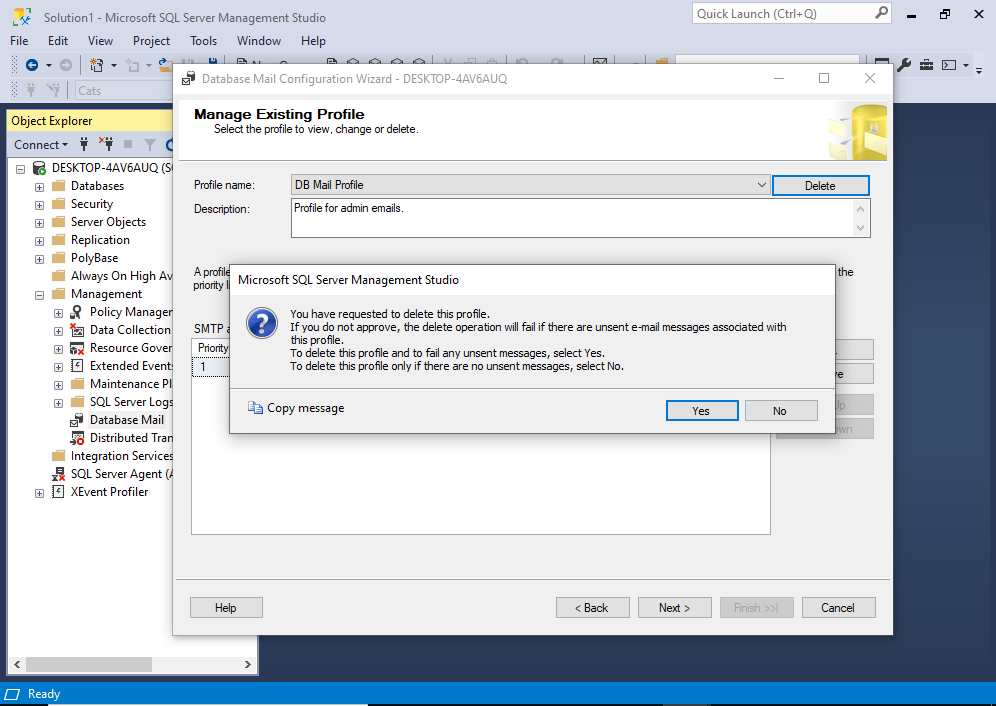
Basically, it’s giving you the opportunity to only delete the profile if there are no unsent emails from this profile.
- If you click No here, then the profile won’t be delete if there are any unsent messages. However, it will delete the profile if there aren’t any unsent messages.
- If you click Yes, then it the profile will be deleted regardless of any unsent mail. Any unsent mail will be automatically failed, once this profile has been deleted.
In my case, I clicked Yes.
Which closed the dialog box and showed me the previous screen again:
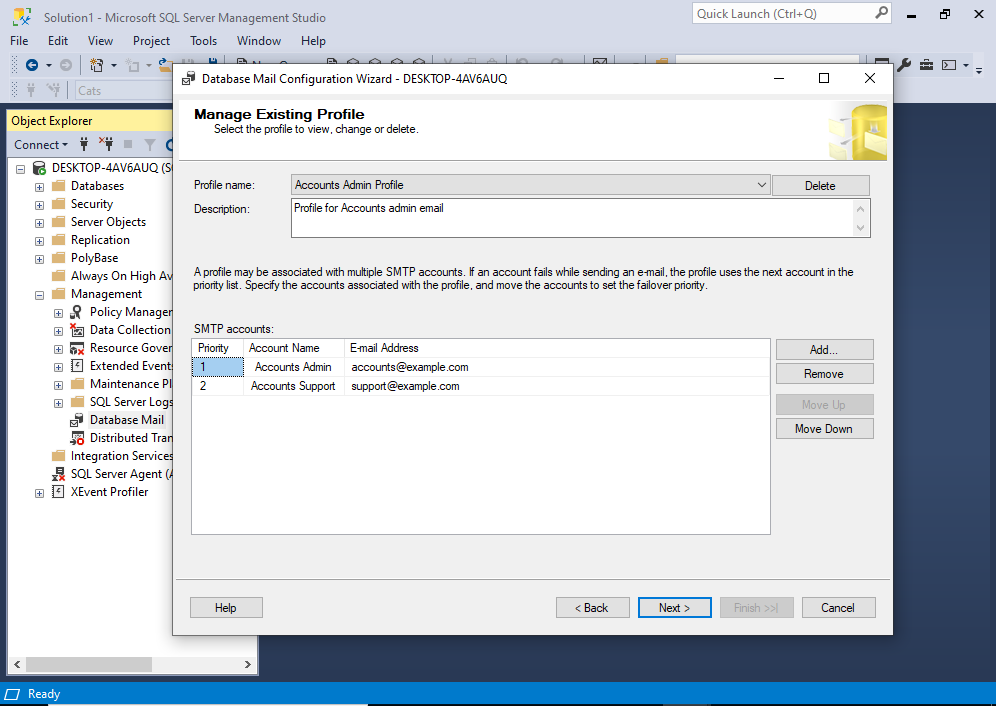
However, now a different profile is showing. This is because I just deleted the other one.
Well, it’s not actually deleted yet.
Once you’re back at this screen, click Next >.
This presents us with one last opportunity to review our changes before committing them:
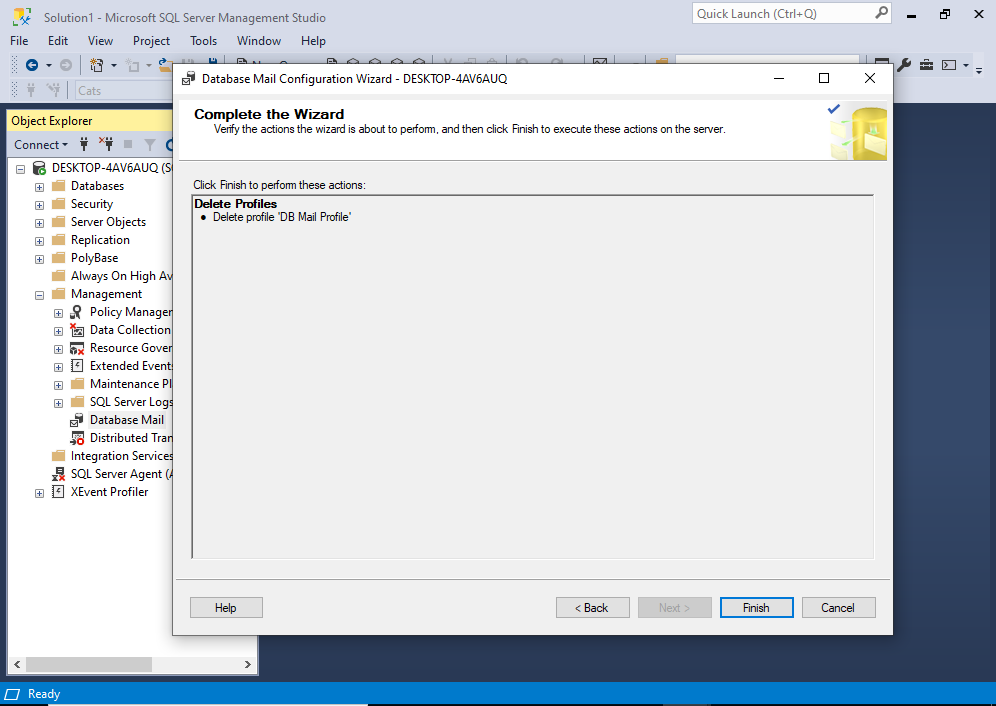
If it’s all good, click Finish.
Finally, the profile is being deleted:
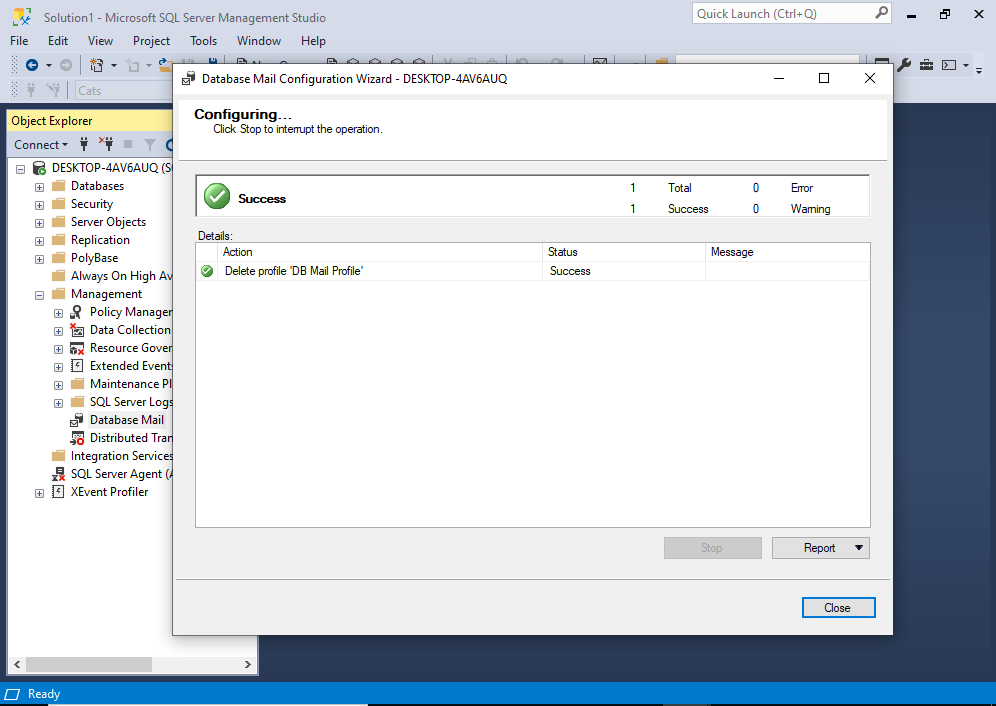
If you see the Success message on this screen, click Close to finish.