In this article, I show you how to create a SQL Server Agent job in the Azure Data Studio GUI.
Here, I create a test job that includes one job step and an attached schedule.
Install the SQL Server Agent Extension
The first thing you need to do is install the SQL Server Agent extension.
If you haven’t already installed this extension, install it, then continue with this article.
See How to Install the SQL Server Agent Extension on Azure Data Studio for installation instructions and screenshots.
Navigate to the SQL Server Agent
With the SQL Server Agent extension installed, navigate to the SQL Agent, so that you can create your job.
If you don’t know how to navigate to the SQL Server Agent, see How to Locate SQL Server Agent Jobs in Azure Data Studio for instructions and screenshots.
Create the Job
Having navigated to the SQL Server Agent, the Jobs overview page is displayed:
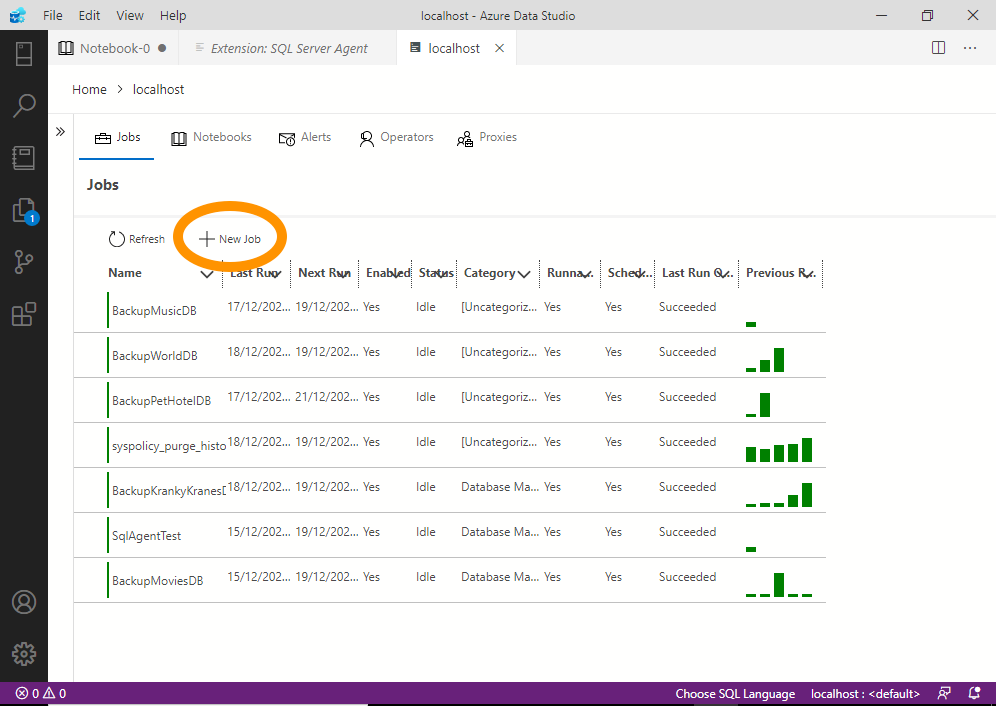
Click New Job:
This opens the New Job dialog:
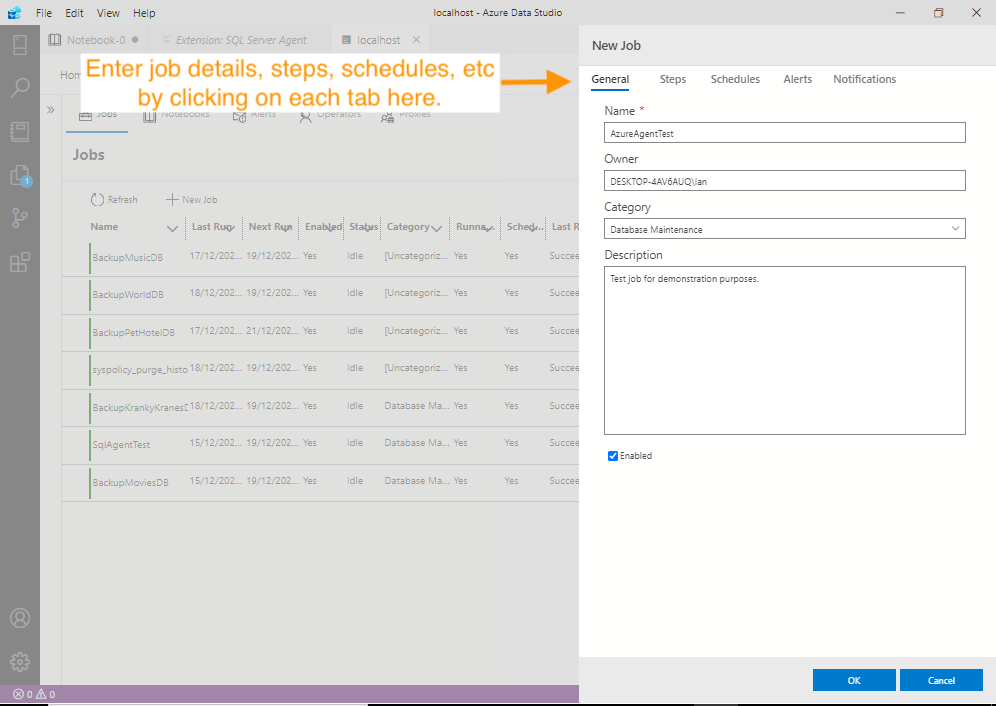
Enter the job name and fill out the other fields.
Don’t click OK yet.
Instead, click the Steps tab at the top. This opens the Steps screen:
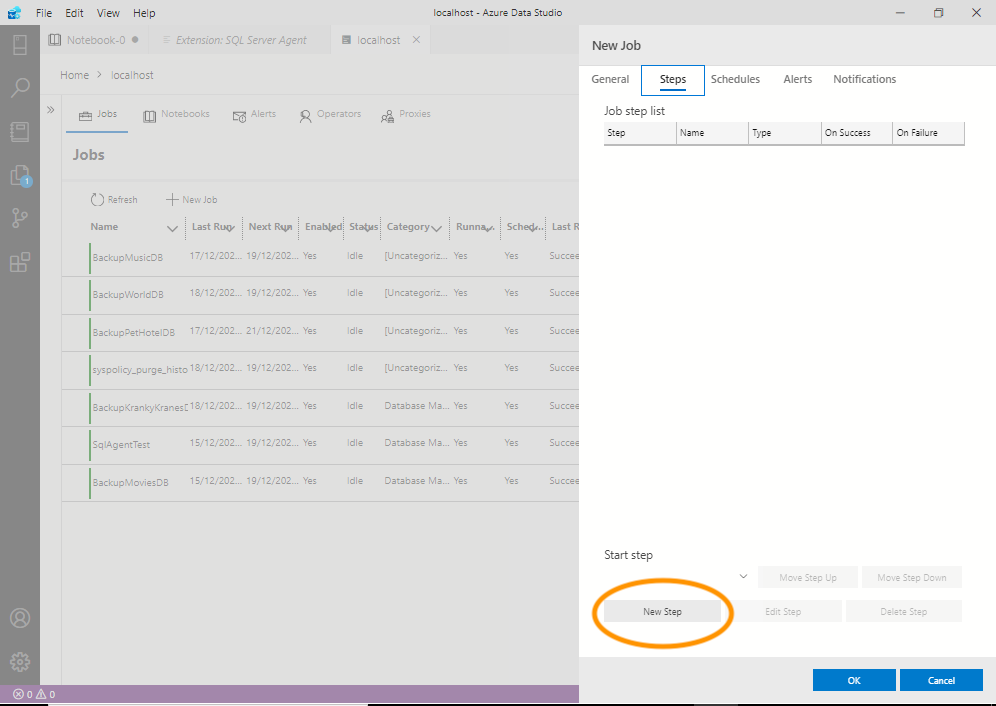
Click New Step.
That opens the New Job Step screen:
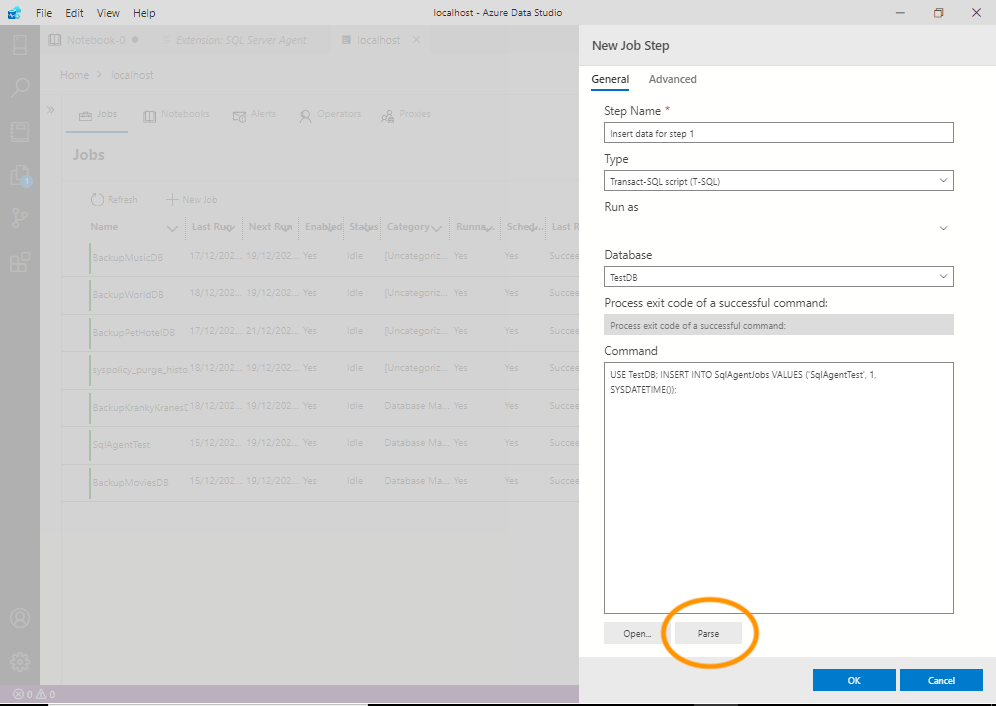
Enter the job step details as required. Click Parse to verify that any code you provided can be parsed without any errors.
A message is displayed that informs us whether the code was successfully parsed or not.
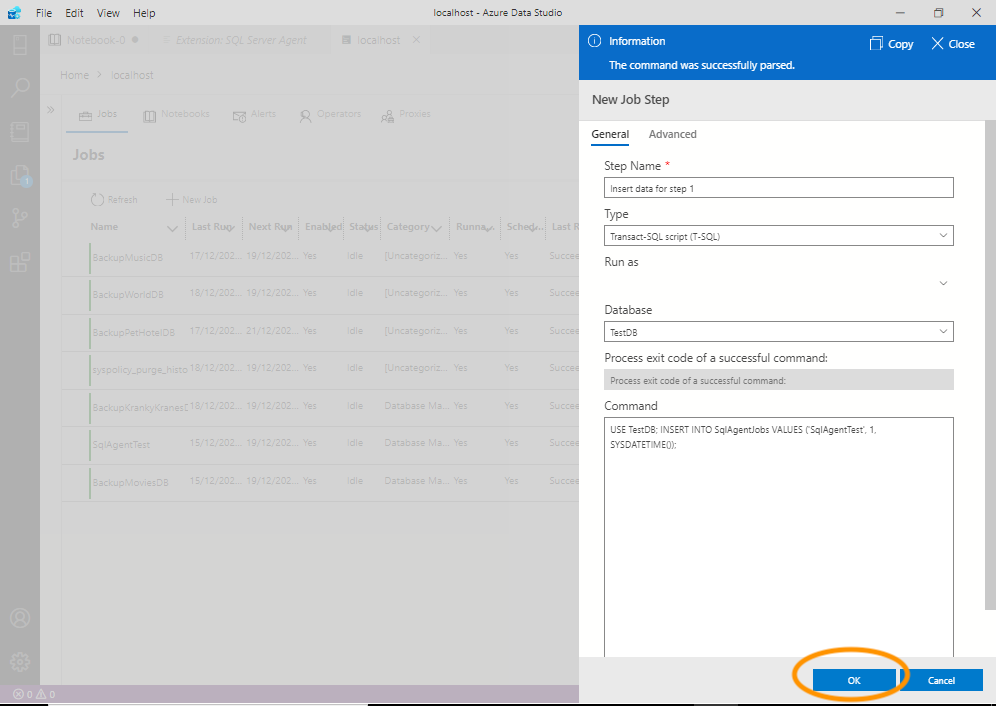
Once it can be parsed successfully, click OK.
This brings us back to the New Job screen, and we can now see our job step in the list of steps:
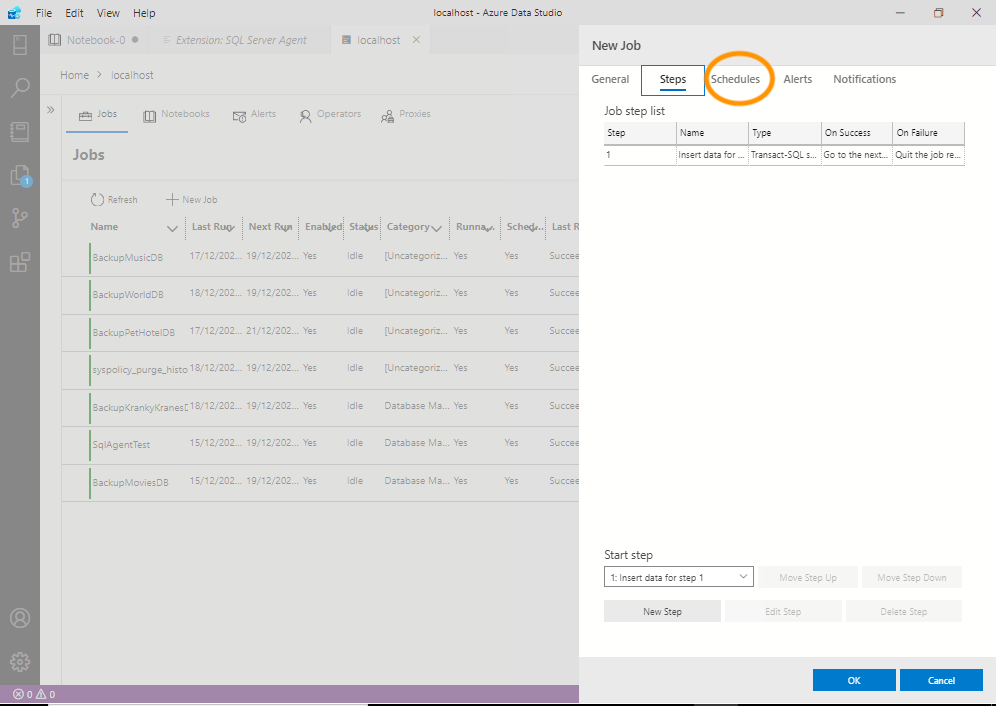
If you need to add more steps, go ahead and click New Step again and complete the details of each new step.
Once you’ve completed all job steps, click Schedules at the top.
This moves us to the screen for picking a schedule. At the bottom of this screen are two buttons; one for picking a schedule and another for removing a schedule:
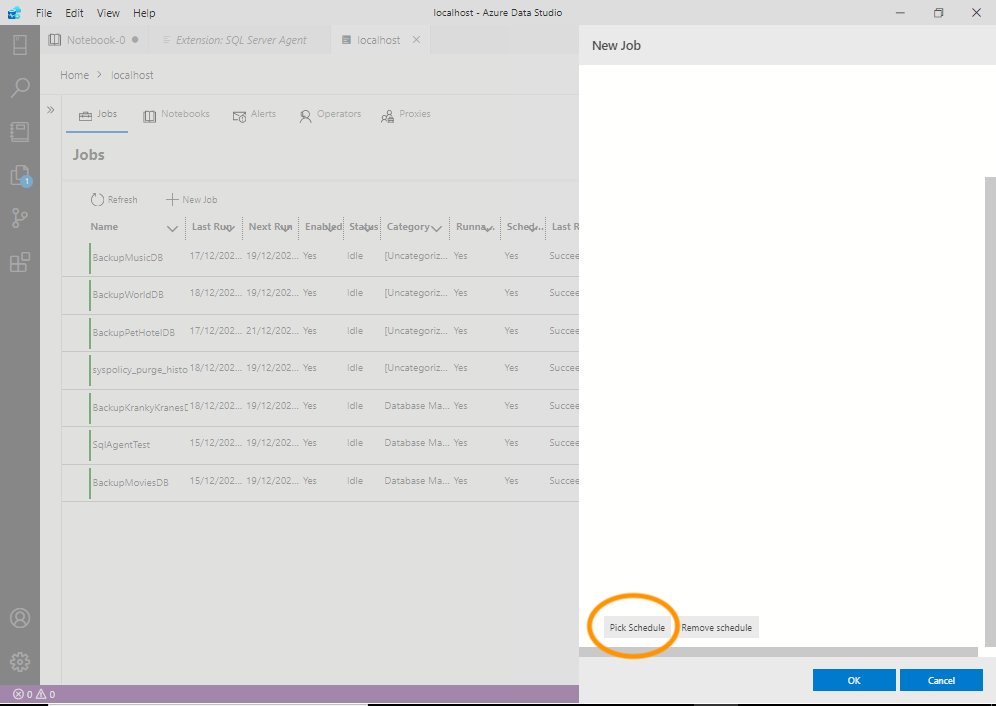
Click Pick Schedule.
This brings us to a screen that allows us to select a schedule from a list of available schedules:
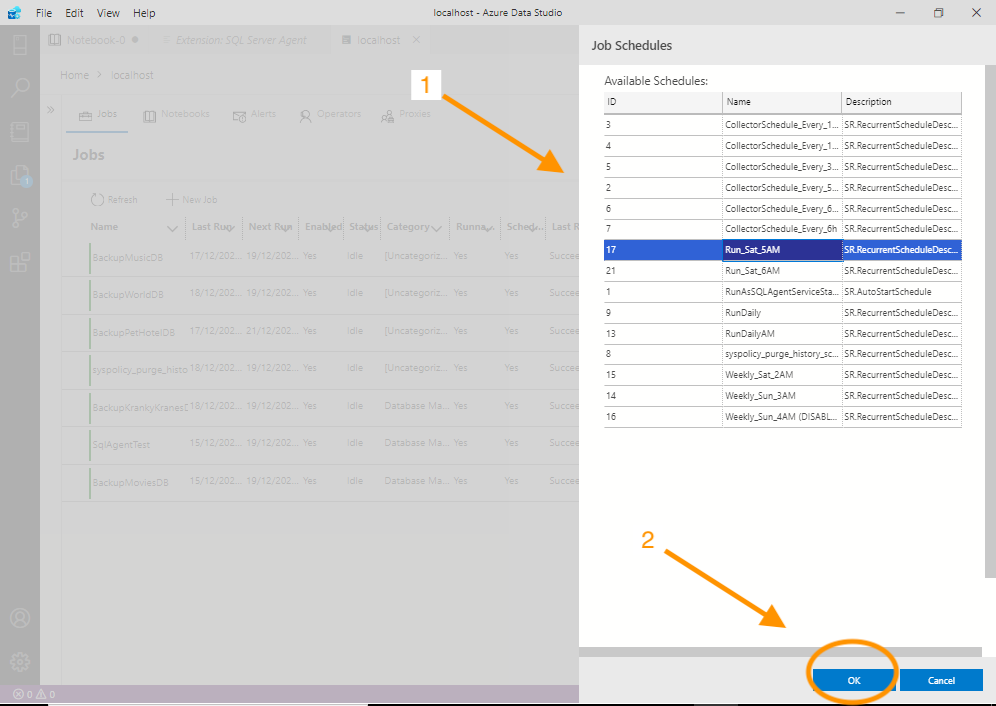
Click a schedule to select it, then click OK to attach it to your job.
As of this writing, it appears that we can’t create new schedules with the SQL Server Agent extension. We can only pick an existing schedule, or remove one.
If you can’t see an appropriate schedule in the list here, you’ll need to create a new schedule. See Create a SQL Server Agent Schedule with T-SQL to do that. That article also shows you how to attach the schedule with T-SQL, so if you do that, you won’t need to attach it with Azure Data Studio.
If you do need to create a schedule, it’s fine to save the current job as it is. You can create jobs without schedules (and even without job steps), then add those schedules later.
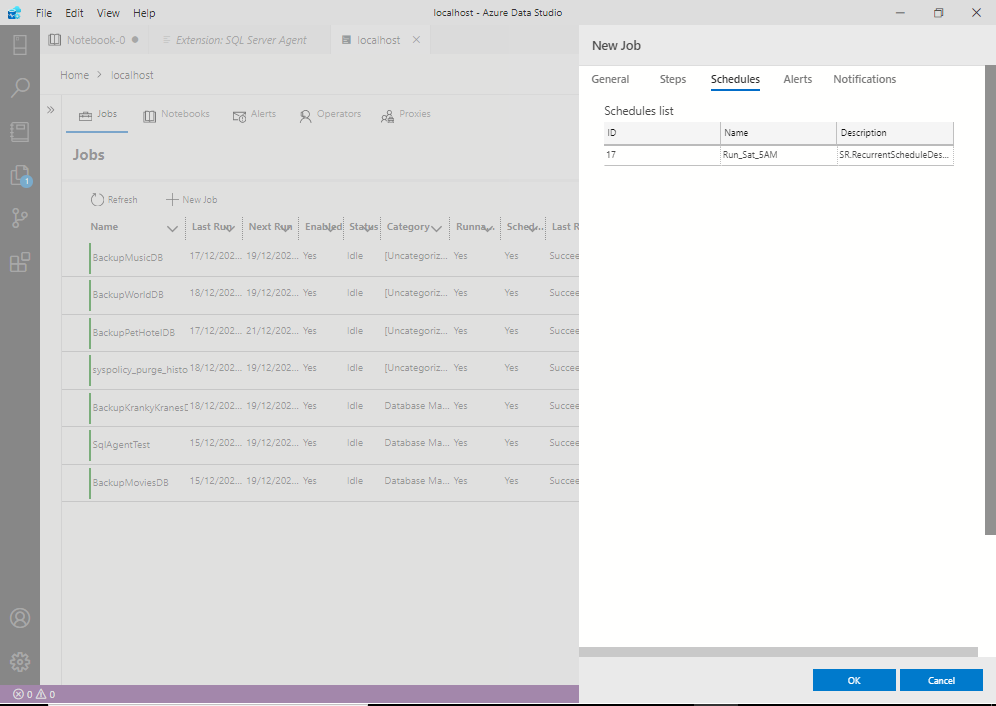
Once you’ve attached the schedule, you should see it listed in the Schedules screen:
At this point, you have the option of adding alerts and/or notifications if required. If you need to do that, go ahead and click the Alerts and/or Notifications tabs and enter the relevant details.
We won’t do that for this tutorial though.
Once you’re done, click OK.
This returns us to the main Jobs screen, with our newly created job included in the list of jobs:

Test/Run the Job
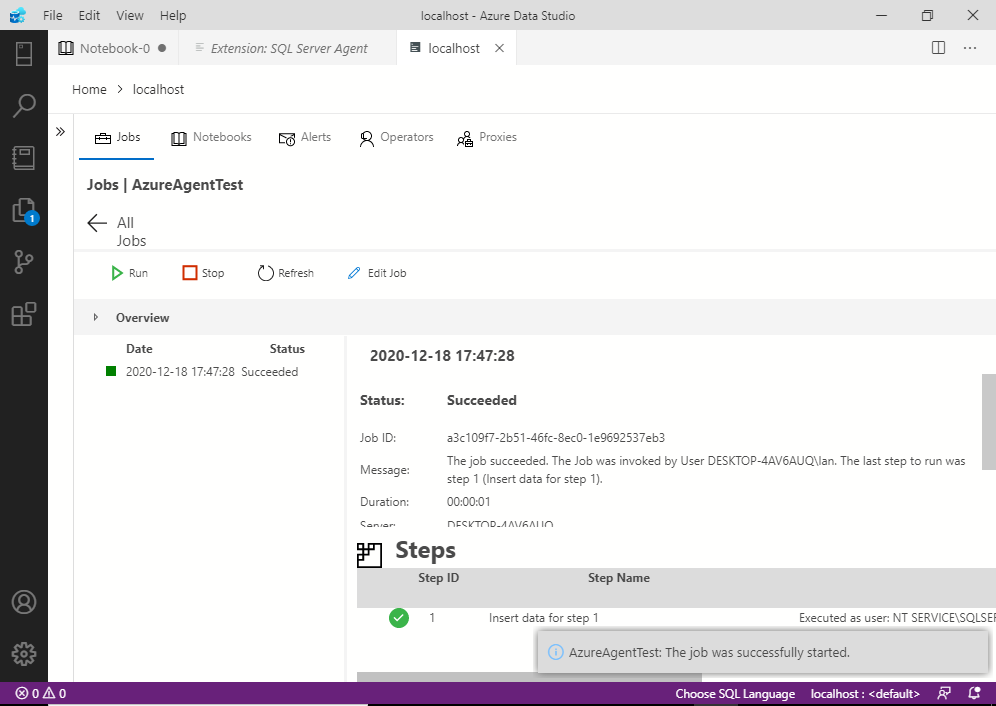
To run the job, right-click on the job to bring up the contextual menu:
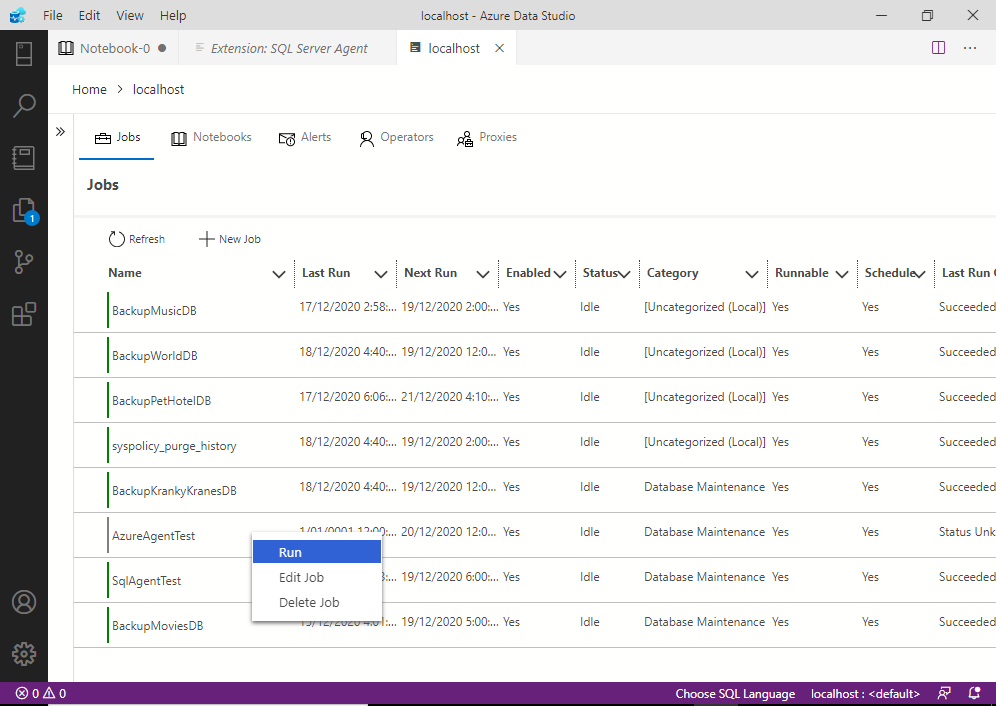
Click Run to run the job.
You can then click on the job to see its run history: