To create a table in the MySQL Workbench GUI:
- Under the appropriate database in the left navigation pane, right-click Tables and select Create Table...
- Enter the table name, add all column names, their data type, constraints, default values, and any other details as required, then click Apply
- Review the SQL statement that will be run against the database and click Apply
The table will now be created, and a message will display advising that the script was successful.
Below are screenshots of the above steps.
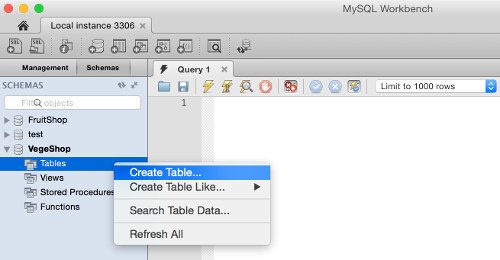
The Left Navigation Pane
Under the appropriate database in the left navigation pane, right-click Tables and select Create Table...:
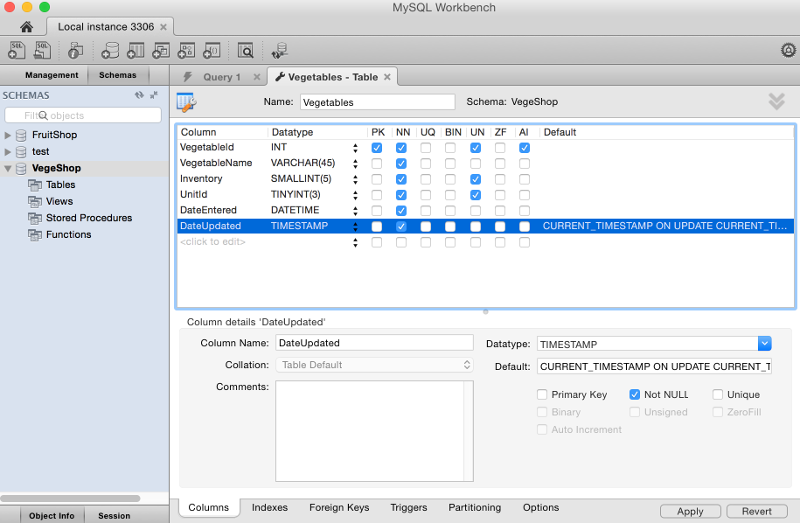
Configure the Table
Enter the table name, add all column names, their data type, constraints, default values, and any other details as required, then click Apply:
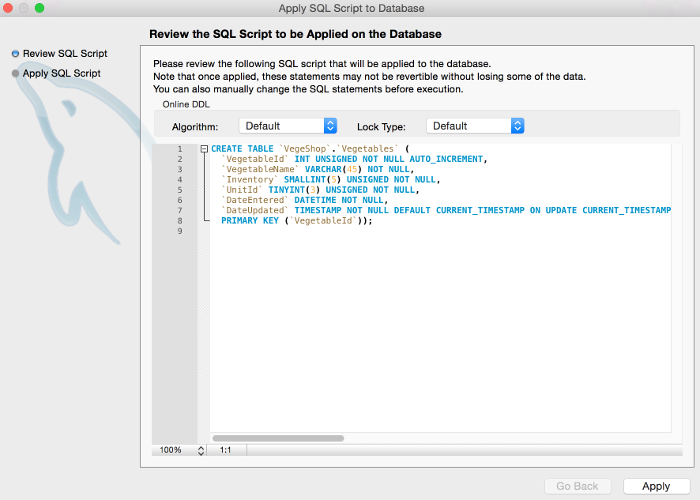
Create the Table
Review the SQL statement that will be run against the database and click Apply:
The table will now be created, and a message will display advising that the script was successful.
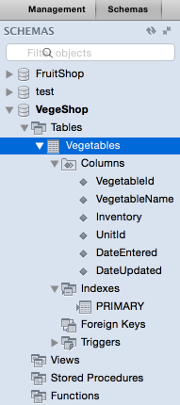
You can now navigate to the table in the left navigation pane. Expanding the table will reveal the columns that you specified.