This article is part 2 of the database tutorial.
Here, we cover:
- Relationships
- The different ways of adding data to a database
- Querying a database
(You can also check out part one if you haven’t done so already).
Relationships
Relationships are an integral part of relational databases. Relationships enable us to join data from different tables, so that we can see data that is related – regardless of which table it was entered into.
Let’s look at our database diagram again:

If you look at the above diagram, you can see that the Artists table has an ArtistId field. But you can see that the Albums table also has an ArtistId field.
There’s a good reason for this. The ArtistId field in the Albums table stores the same value as the ArtistId field in the Artists table. Doing this enables us to see which artist each album belongs to.
So we can see that the album with an AlbumId of 1 belongs to the artist with an ArtistId of 3.

One of the main benefits of doing this is that we only need to enter data once. We can enter an artist once, then have many albums referencing that artist.
If we didn’t use a relationship, we would need to store the full artist details against every album related to that artist. So if an artist produced 10 albums, that artist’s name would need to be duplicated 10 times in the Artists table. That’s how we would need to do it if we’d used a “flat file” database.
Here’s a more detailed explanation on relationships if you’re interested.
And here’s how to create a relationship in Access.
Adding Data into a Database
Most database management systems enable various methods of adding data to a database.
Enter Data Directly into the Table
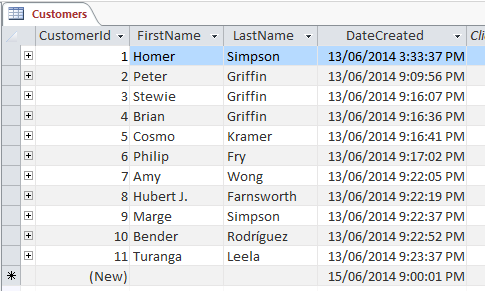
You can add data by entering it directly into each cell in the table (similar to adding data to a spreadsheet). This might be OK for when developing a database, but it’s not normally the preferred method for a business environment.
Import Data
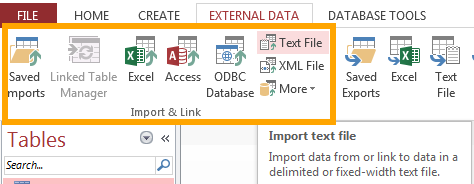
You can import data using an “import wizard” or similar function. This allows you to copy data across from another database or even a spreadsheet or .csv file.
Most DBMSs provide the ability to import data from a wide variety of sources. However, you will need to make sure you have a table set up with the applicable columns and data types.
Taking it a step further, Microsoft Access actually provides the option of creating a table from the external data.
Database Form

Some DBMSs allow you to create a form that enables users to enter data.
This is how a lot of small businesses enter data – through a purpose built form developed from within the database.
In MS Access, you can even select a table, then get Access to generate a form automatically, based on the table you selected.
Custom Built Form
If the DBMS doesn’t provide the option of creating a form, you can create your own application that accesses the database. You can add forms and other features to this application.
This is how most websites and other corporate applications work. The website/application is not part of the database – it simply uses the database for storing and retrieving data.
Run an SQL Statement
You can also add data by using SQL statements.
This method is commonly used by developers when setting up a database or maintaining it.
The INSERT statement is used for inserting data. There’s also an UPDATE statement for updating, and a DELETE statement for deleting (as well as many others for other specific uses).
Querying a Database
One of the main reasons of having a database is to be able to query the data within it.
Again, most DBMSs provide tools for querying the database both graphically, and programatically.
Using the GUI
Here’s an example of a query being built using the GUI in Microsoft Access.
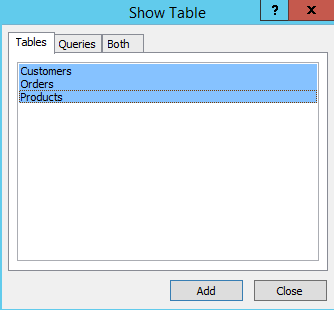
Click the Query Design button from the Ribbon.

Select the tables to include in the query:
Access will display the Query Design View. This allows you to specify the exact criteria you’d like to use in the query.
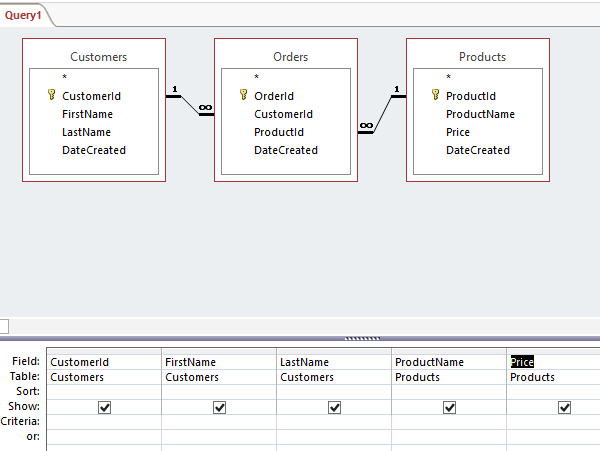
The above query uses three tables (displayed in the top frame). The bottom frame lets you choose which fields/columns to display in the query results. It also lets you specify other criteria that will narrow down the results.
You can run/test your query any time by clicking the Run button in the Ribbon:
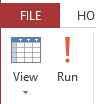
Clicking the Run button will run the query. Clicking the View button next to it will also run the query. You can switch back and forth, making modifications to your query along the way.
Programatically
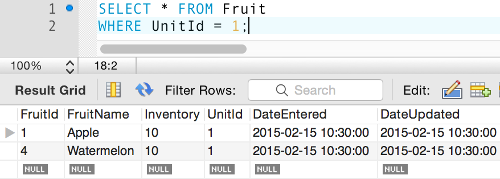
The above screenshot shows what it looks like to run a query programatically using MySQL Workbench.
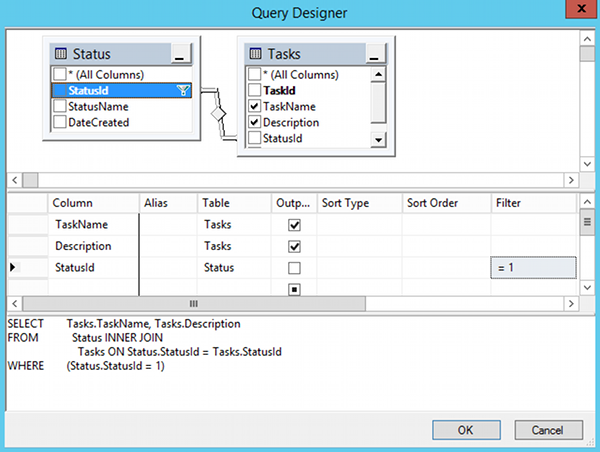
The above screenshot shows the Query Designer in SQL Server. The Query Designer lets you create the query via the GUI, but it also generates the SQL code in the bottom frame. Clicking OK will take you to a query window (similar to the MySQL one above) where you can run the query.
Next Steps
That’s the end of this database tutorial.
From here, feel free to review the tutorial again, or move on to a more detailed tutorial, such as my SQL Tutorial for Beginners.
Database Tutorial (Part 1)
You can go back to part 1 of this tutorial for a refresher on any of the basic concepts.
Microsoft Access Tutorial
Check out my Microsoft Access Tutorial for more detail on many of the above concepts. It provides step-by-step instructions for creating a database, creating tables, setting up their columns and data types, creating queries, creating macros, and more.